
Table of Contents
1. Overview
3. Get API Key
1. Overview
On this page, you will learn how to create an image template in DynaPictures, an image generation platform with API, and use REST API to generate image variations for this template.
2. Prepare Image Template
In this section, we will create an image template containing a Twitter banner with a bubble, quote text and author’s info.
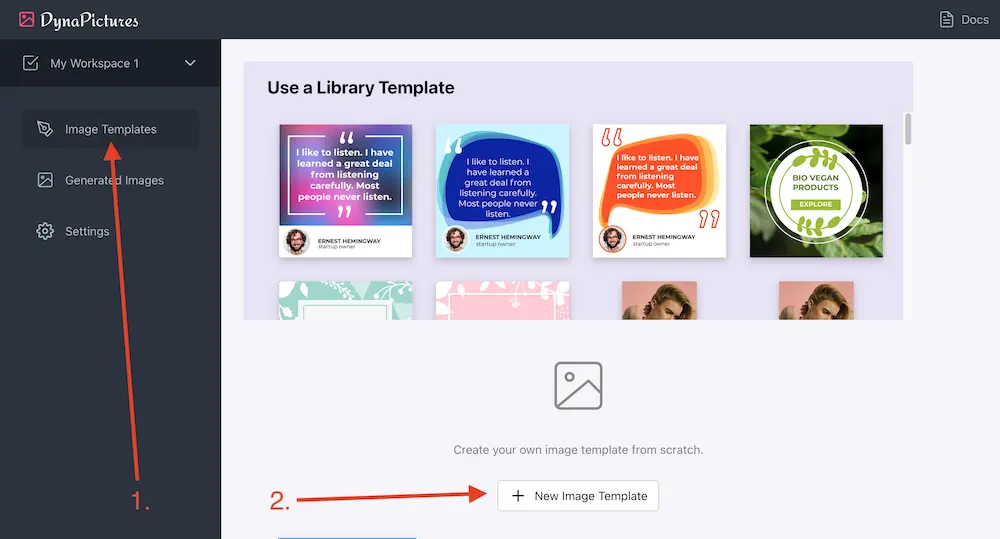
Sign in to DynaPictures, go to “Image Templates” on the left, and click on the “New Image Template” button.
New image template will be created and the template editor page will be opened. Now you can edit the template name, change size, and add new layers. All changes are automatically saved when you make them. See the annotations on the image below:
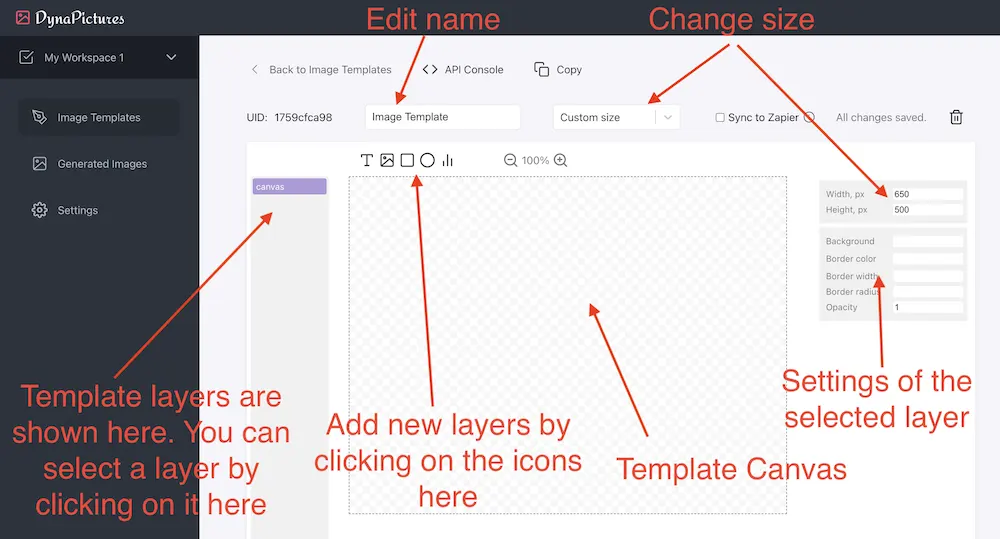
We need to change the template size so that it’s square and has the correct resolution. Select the “Square (1200×1200)” option in the dropdown next to the template’s name.
Now let us add the following layers needed for the banner:
a) Background image
Click on the image icon in the toolbar. Resize the image element so that it fits the entire container. Click on the “Upload” button in the image element and upload an image that will be used as a background.
Change the layer name to “background” in the layer settings panel on the right. It’s the “Layer Name” field at the bottom of the settings area. This name can be used later in REST API calls to customize the layer in generated images.
b) Quote Text
Click on the text icon in the toolbar and position the quote text area by dragging and resizing it. Select the background color in the settings panel and set the transparency (the A field in the RGBA row) level to 63. The padding must be set to 40, the border radius to 30, and the layer name to “quote_text”.
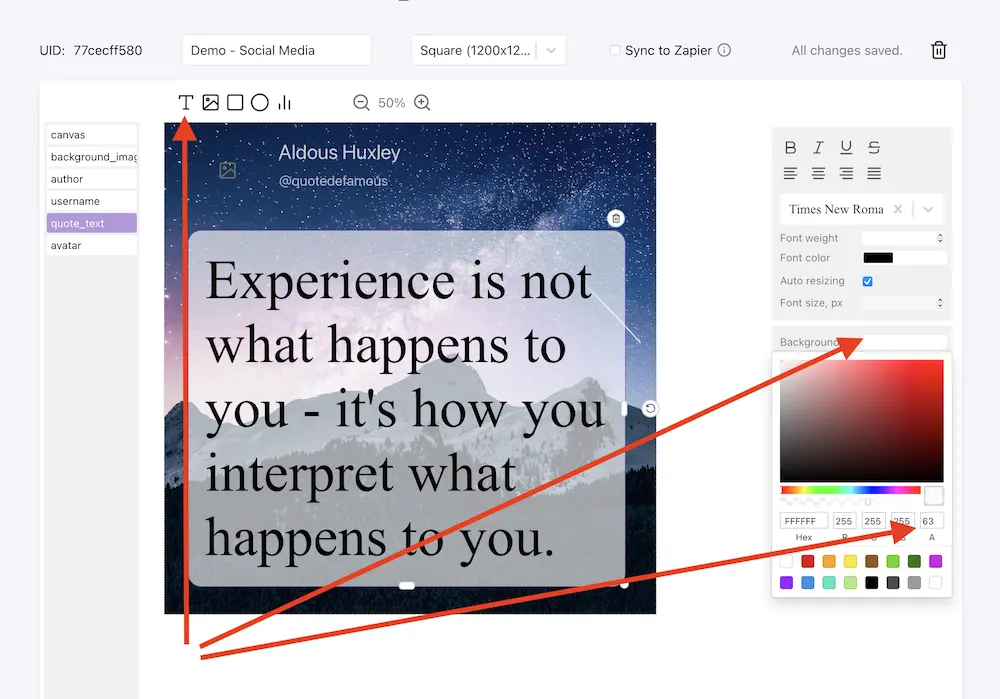
c) Author Avatar
Click on the image icon in the toolbar and then resize and position the image element for the author avatar. Set the border color to #FFFFFF and the A field for transparency to 58. The border radius can be set to 102 or some other value, depending on the size of the image element, so that it becomes round. Set the layer name to the “avatar”.
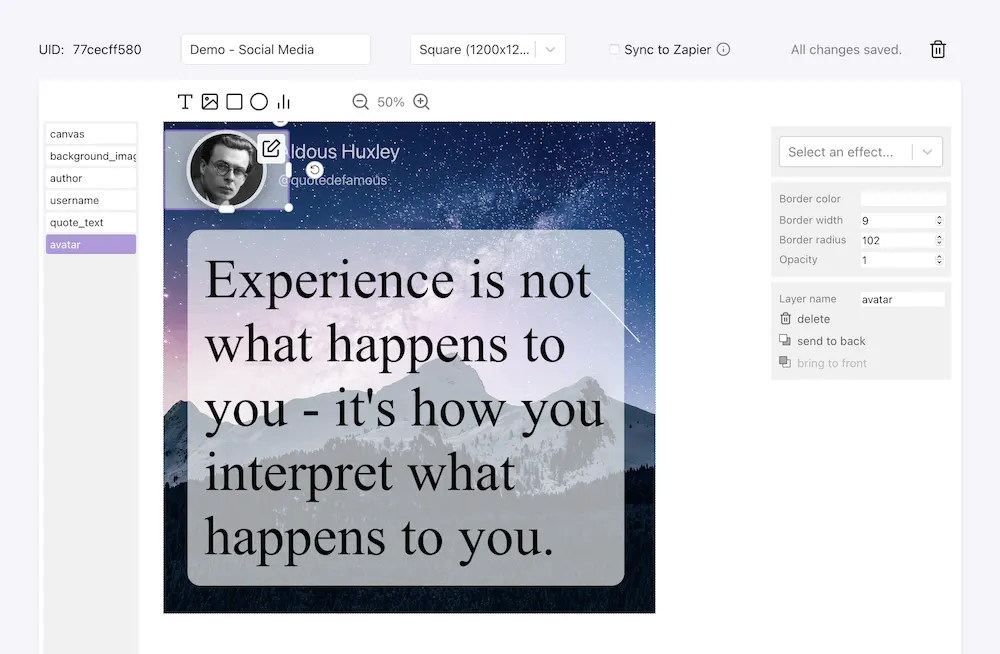
d) Author Name
Click on the text icon in the toolbar and then resize and position the text element next to the avatar. You can keep an auto-resizing option for the text size in the settings panel, or set the font size manually. Depending on the color of your background image, you may change the color of the text as well. Set the layer name to the “author”.
e) Author Username
Click on the text icon in the toolbar and resize and position the created text element next to the avatar and below the author’s name. Adjust the font size and the color if needed. Set the layer name to “username”.
The image template is ready now and you can go to “API Console” at the top and see the sample REST request made to the designs endpoint. This sample request contains test data for every layer in the template so that you can see what can be customized. In the next section, we will make such a REST request on our own.
3. Get API Key
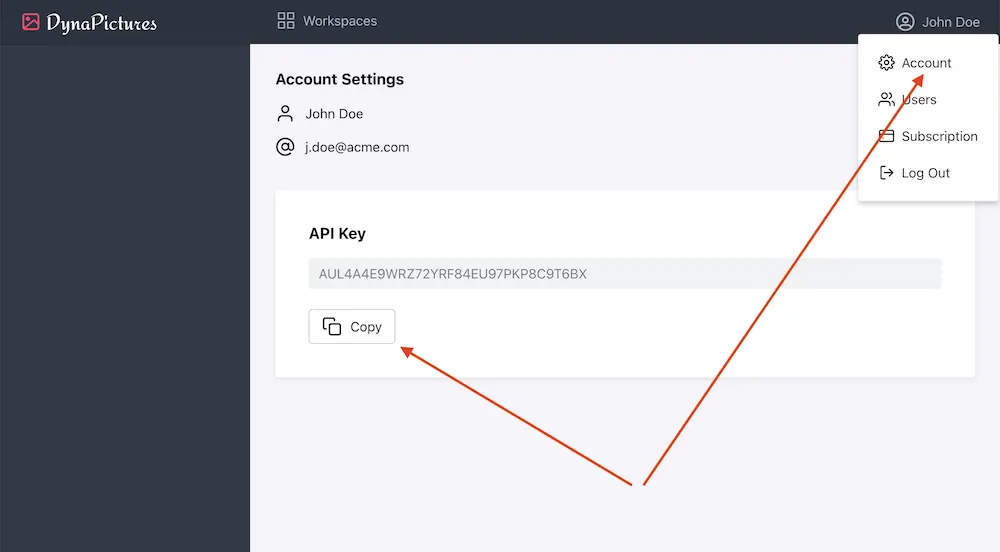
Before you start using the DynaPictures REST API, you need an API key. The API key is a unique identifier that authenticates requests associated with your account for usage and billing purposes. To get an API key, click on your name in the upper right corner and go to the Account page. You will see an API Key section where you can copy your key.
4. Generate Image Variations
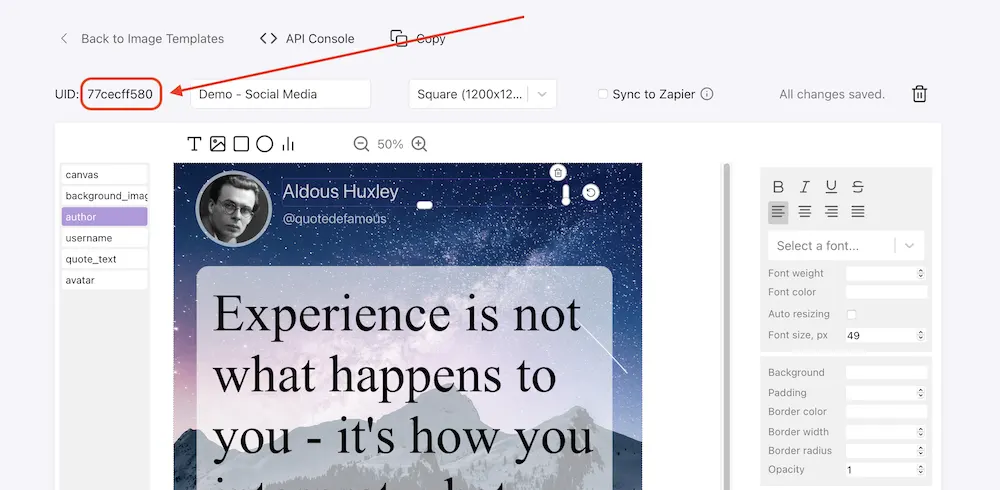
Now we can start generating image variations via REST API. You can use your favourite programming language, command line, or tools like Postman or Insomnia. We will need an ID of the template that will be used to generate images. You can get it in the upper left corner of the template page:
Here are the details of the request that we are going to make:
| Endpoint URL | https://api.dynapictures.com/designs/{template_id} |
| Request Method | POST |
| Header “Authorization” | Bearer {API_KEY} |
| Header “Content-Type” | application/json |
| Request Body | JSON Document with layer settings |
We define the specific settings for the image template in the request body so that DynaPicture knows how to customize the template and generate an image variation. For example, here is a sample JSON document with customizations for the canvas background color, quote text, author name, and username.
 {  "params": [
    {
      "name": "canvas",
      "backgroundColor": "#fff"
    },
    {
      "name": "author",
      "text": "Tony Stark"
    },
    {
      "name": "username",
      "text": "@ironman"
    },
    {
      "name": "quote_text",
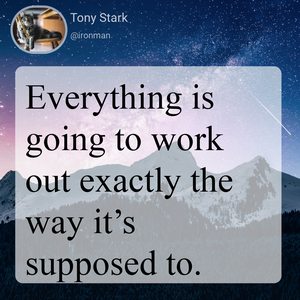
      "text": "Everything is going to work out exactly the way it’s supposed to."
    },
    {
      "name": "avatar",
      "imageUrl": "https://dynapictures.com/images/banners/cat1.jpeg"
    }
  ]
}
As you can see, we specify the name of the layer in the “name” attribute of the parameter object and then set other attributes like “text” for the text content of the text element or “imageUrl” for the image element. See API Reference for more details.
Finally, let us make a REST request and generate an image now. We will use the command line in this example. Please make sure you replace the MY_API_KEY and MY_TEMPLATE_ID with your actual values:
curl -d '{"params":[{"name": "canvas","backgroundColor": "#fff"},{"name": "author","text": "Tony Stark"},{"name": "username","text": "@ironman"},{"name": "quote_text","text": "Everything is going to work out exactly the way it’s supposed to."},{"name": "avatar","imageUrl": "https://dynapictures.com/images/banners/cat1.jpeg"}]}' -H "Authorization: Bearer MY_API_KEY" -H "Content-Type: application/json" -X POST https://api.dynapictures.com/designs/MY_TEMPLATE_IDThe following response document is returned synchronously, once the image is generated:
{
  "id": "6b14925848",
  "templateId": "77cecff580",
  "imageUrl": "https://api.dynapictures.com/images/ff01d10f8d/6b14925848.png",
  "thumbnailUrl": "https://api.dynapictures.com/images/ff01d10f8d/6b14925848-thumb.png",
  "retinaThumbnailUrl": "https://api.dynapictures.com/images/ff01d10f8d/6b14925848-thumb-2x.png",
  "metadata": null,
  "width": 1200,
  "height": 1200
}
Congratulations! We generated our first image variation and can download it by opening the URL provided in the “imageUrl” field: