Table of Contents
1. Overview
2. What is Zapier?
3. Create Zapier Account
4. Prepare Your Image Template
5. Create a Spreadsheet
6. Create a Zapier Automation (Zap)
7. Configure Trigger to Start Automation
8. Prepare Action to Generate an Image
9. Save an Image to Google Drive
10. Final Words
11. Next Steps
1. Overview
On this page, you will learn how to connect DynaPictures to Google Sheets and Google Drive with Zapier. We will focus on the integration with Google Sheets to specify personalized values for the image layers and on using Google Drive to store generated images in the end.
Here is what we will get at the end:
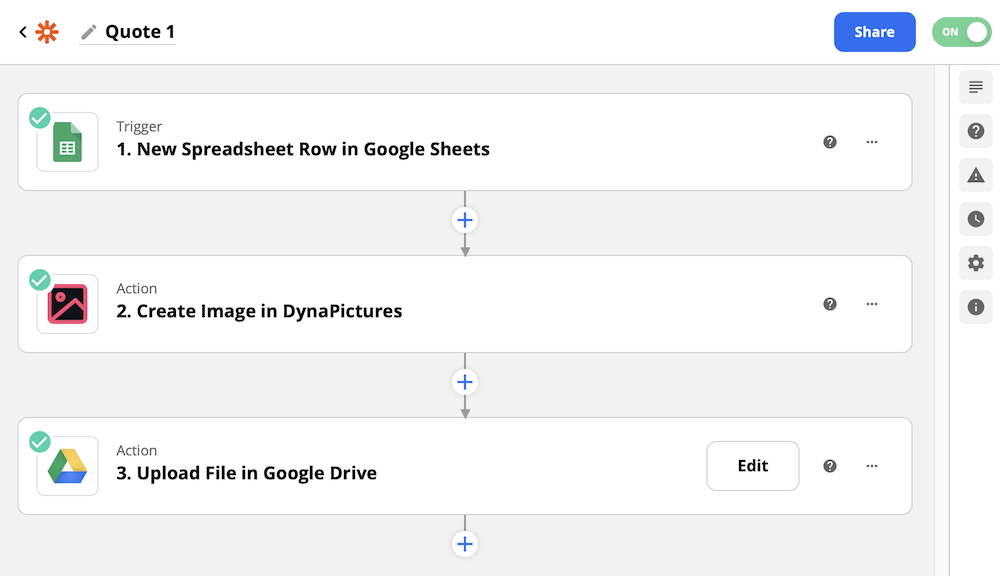
Warning: As we will be creating a Zapier workflow with three actions, this requires you to be at least on the "Starter" plan at Zapier. If you don't have it yet, you will be asked to upgrade on the final step. If you are happy with the free plan and don't want to upgrade, just follow this tutorial till the end of the 8th step (8. Prepare Action to Generate an Image) and then click on the "Turn on Zap" button of the second step of the workflow ("Create Image"). Then you can add new rows to a spreadsheet, and access generated images either in "Generated Images" section in DynaPictures, or in the Zap history in Zapier.
2. What is Zapier?
Zapier lets you connect DynaPictures to 3,000+ other web services. Automated connections called Zaps, set up in minutes with no coding, can automate your day-to-day tasks and build workflows between apps that otherwise wouldn't be possible. Each Zap has one app as the Trigger, where your information comes from and which causes one or more Actions in other apps, where your data gets sent automatically.
3. Create Zapier Account
Sign up for a free Zapier account here.
4. Prepare Your Image Template
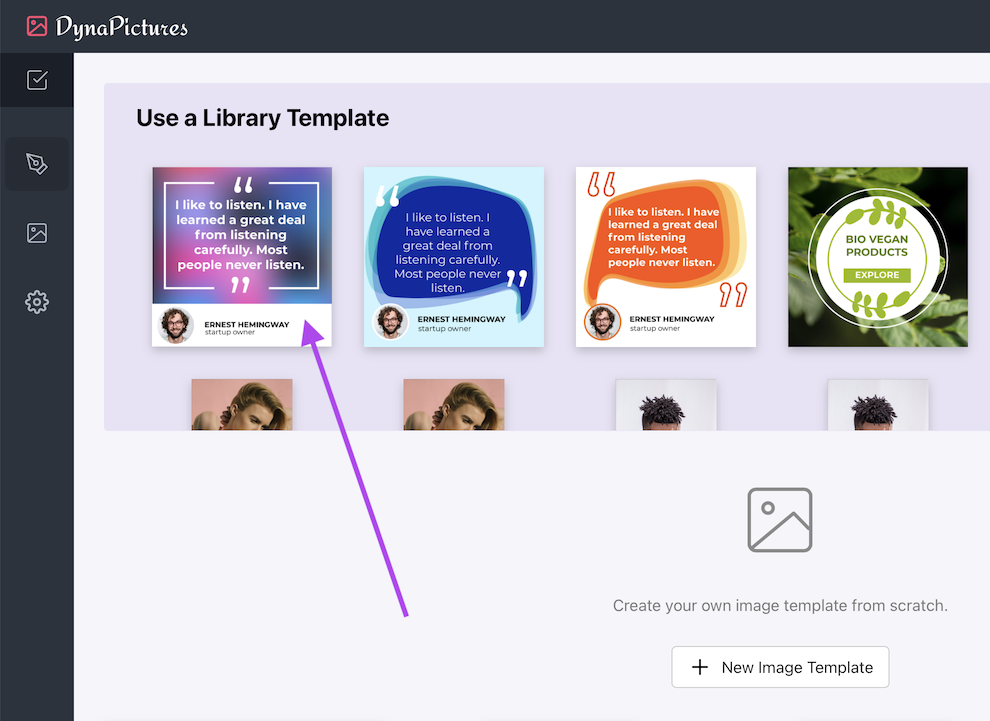
Sign in to DynaPictures and create your own image template by clicking on the first library template:
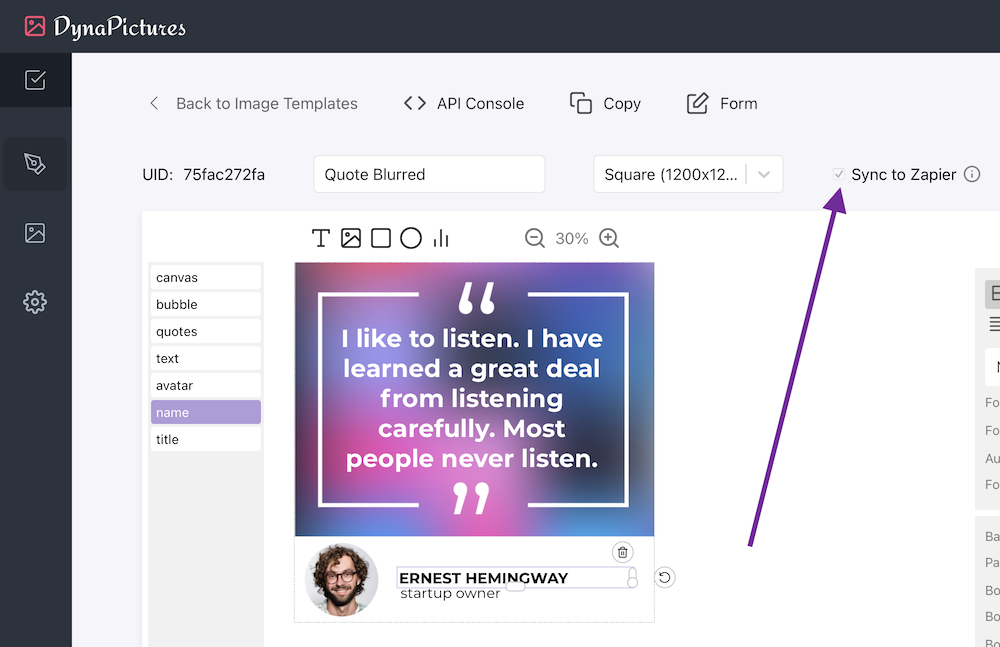
Your image template will be created and the template editor will be opened. Check the checkbox "Sync to Zapier" to upload this image template to Zapier and be able to use it on Zapier side in the next steps:
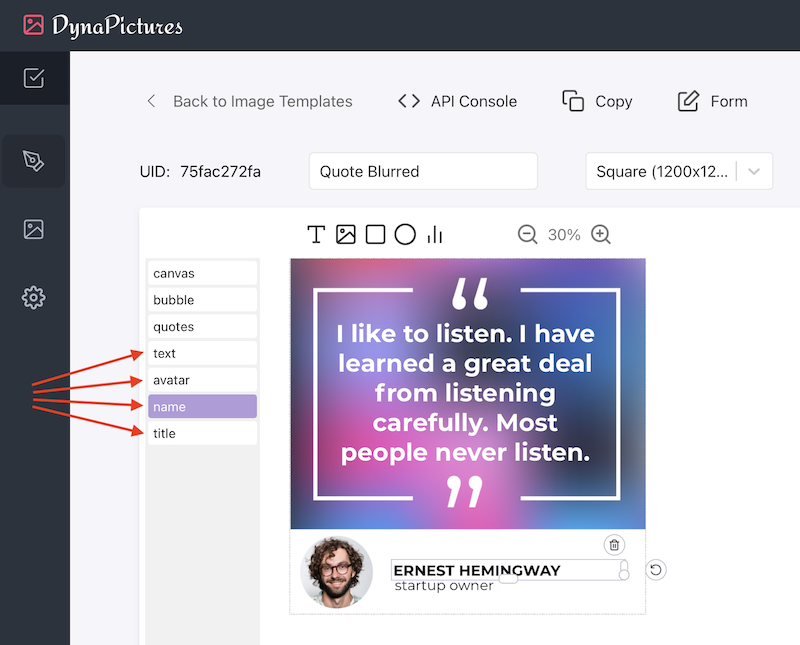
Please note the names of the following image layers on the left, as we will need to customize their values in the next steps:
5. Create a Spreadsheet
We need a spreadsheet in order to specify personalized values for the image layers and then feed it to DynaPictures to generate hyper-personalized images.
Let us create a new Spreadsheet in the cloud using Google Sheets and then connect it to DynaPictures via Zapier.
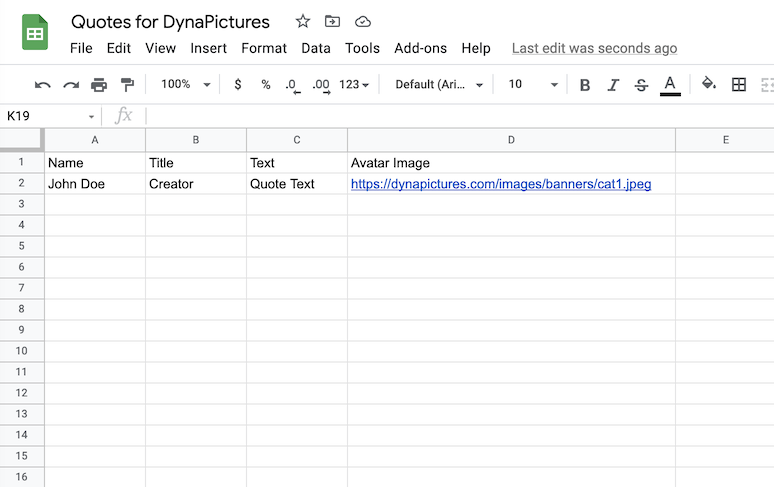
Every image layer must have an individual column in the spreadsheet. Let's enter the names of the image layers we want to customize in the first row of the newly created spreadsheet. Then let us also enter some test data, in the second row, as we will need it later to test our Zapier trigger.
These are our spreadsheet columns, you can copy and paste this row directly as a first row into your spreadsheet:
| Name | Title | Text | Avatar Image |
Here is our test data in the second row, you can copy and paste it directly into your spreadsheet:
| John Doe | Creator | Quote Text | https://dynapictures.com/images/banners/cat1.jpeg |
6. Create a Zapier Automation (Zap)
Zap is an automated workflow that may contain multiple steps. We will have these three steps in our Zap:
1. Trigger: Google Sheets - New Row in a Spreadsheet
2. Action: Generate new image in DynaPicutres for the newly added spreadsheet row.
3. Action: Upload generated image to Google Drive
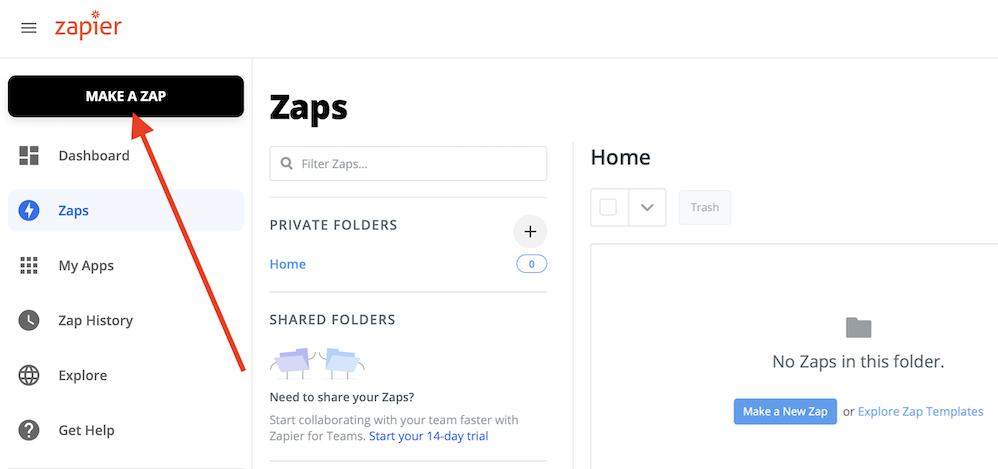
Let's open the Zaps page in Zapier and then click on the button "Make a Zap":
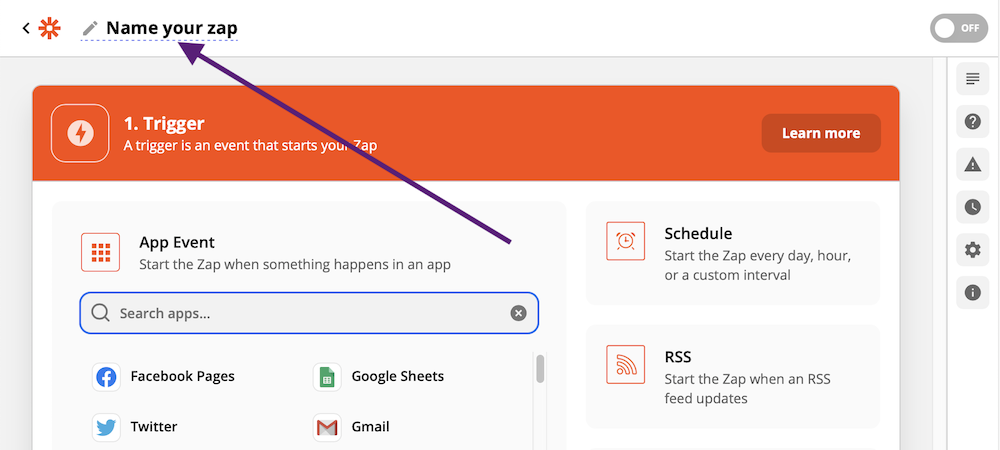
You can name this zap by clicking on "Name your zap" at the top left corner. We will name it "Quote 1":
7. Configure Trigger to Start Automation
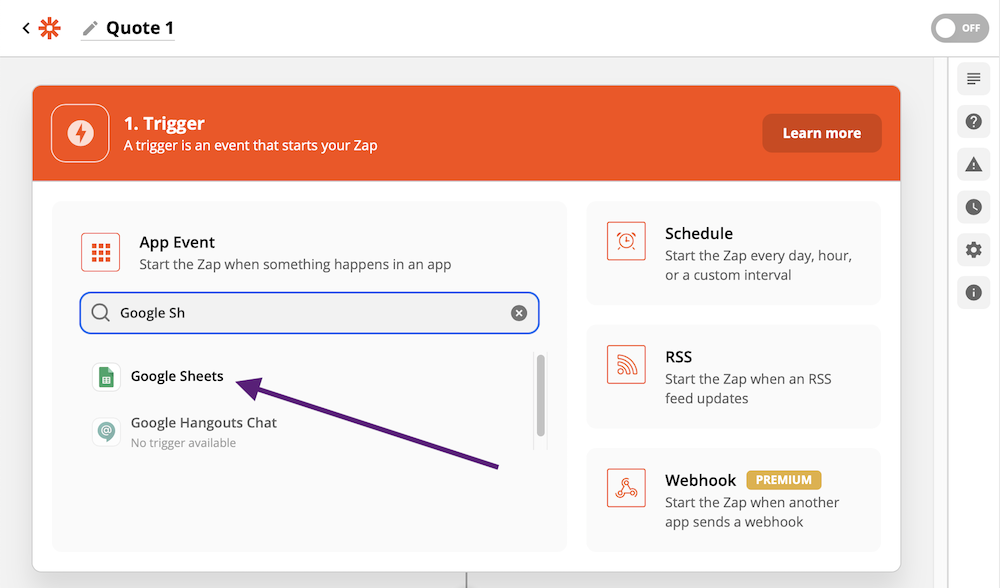
The first step in this automation is to let Zapier know when it should launch it. It's called a Trigger. Click on text field "Search apps...", start typing "Google Sheets" there and then select the Google Sheets app in the dropdown:
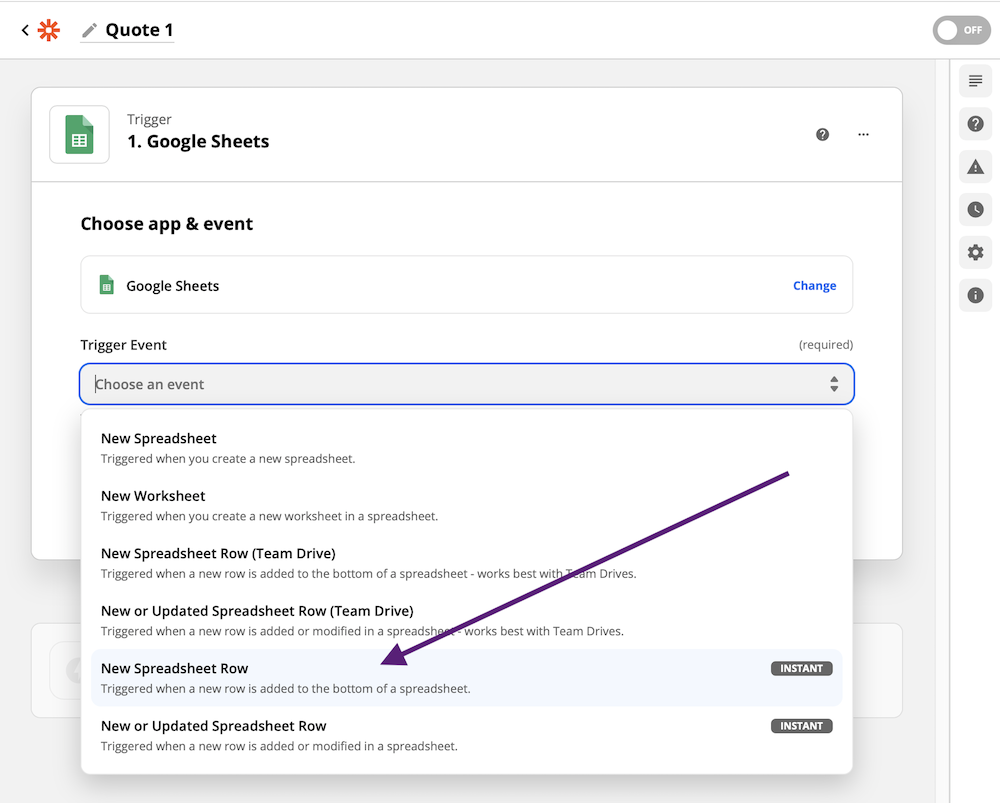
Then select "New Spreadsheet Row" from the dropdown "Trigger Event" and click on button "Continue":
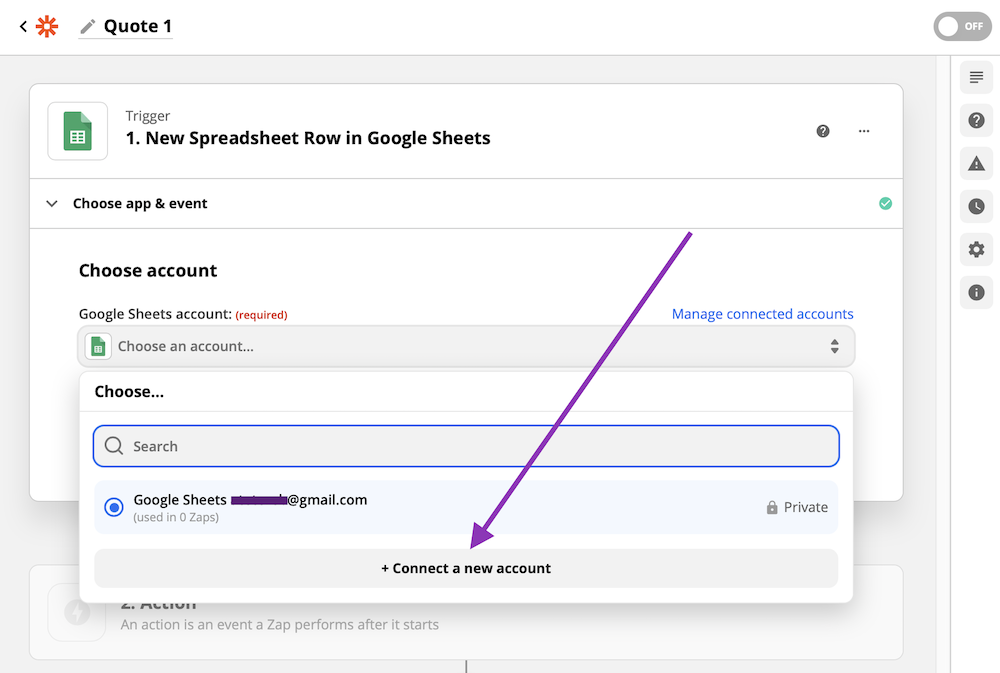
In the next step you will be asked to connect your Google account. Choose an account from the dropdown if you already have one, or click on "Connect a New Account" otherwise. The Google authentication form will be shown in the popup and you will need to sign-in and grant access to Zapier, and then click on "Continue".
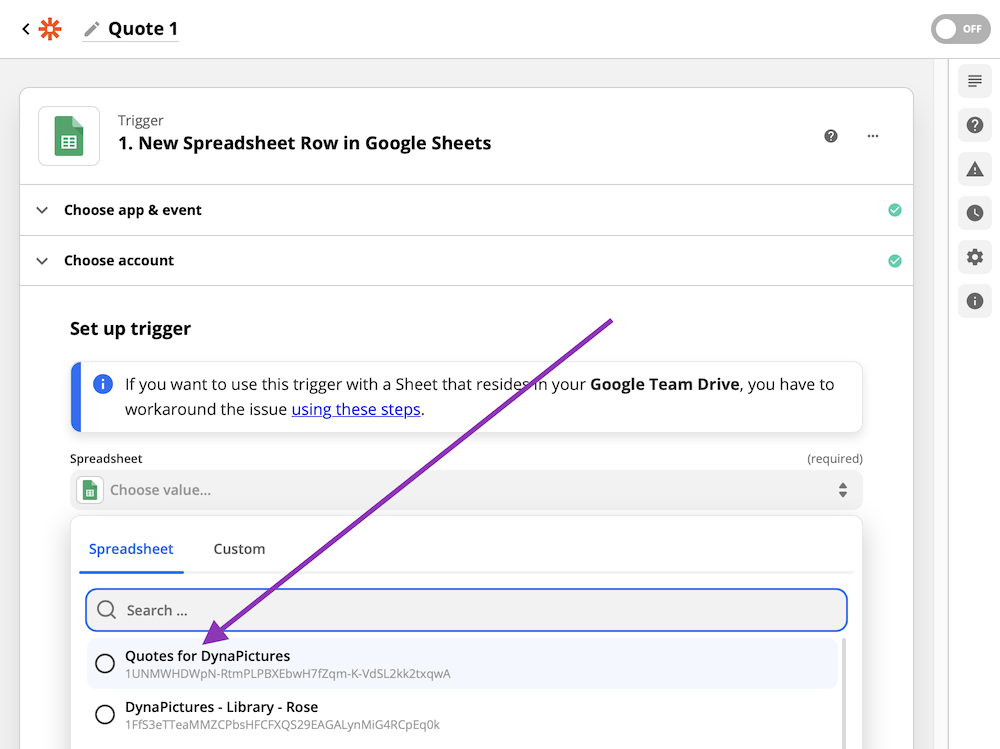
The next step for this trigger is to specify the spreadsheet and its worksheet to be used. Click on "Choose value..." in the "Spreadsheet" field and then select the spreadsheet "Quotes for DynaPictures", this is a spreadsheet that we created in the step #5.
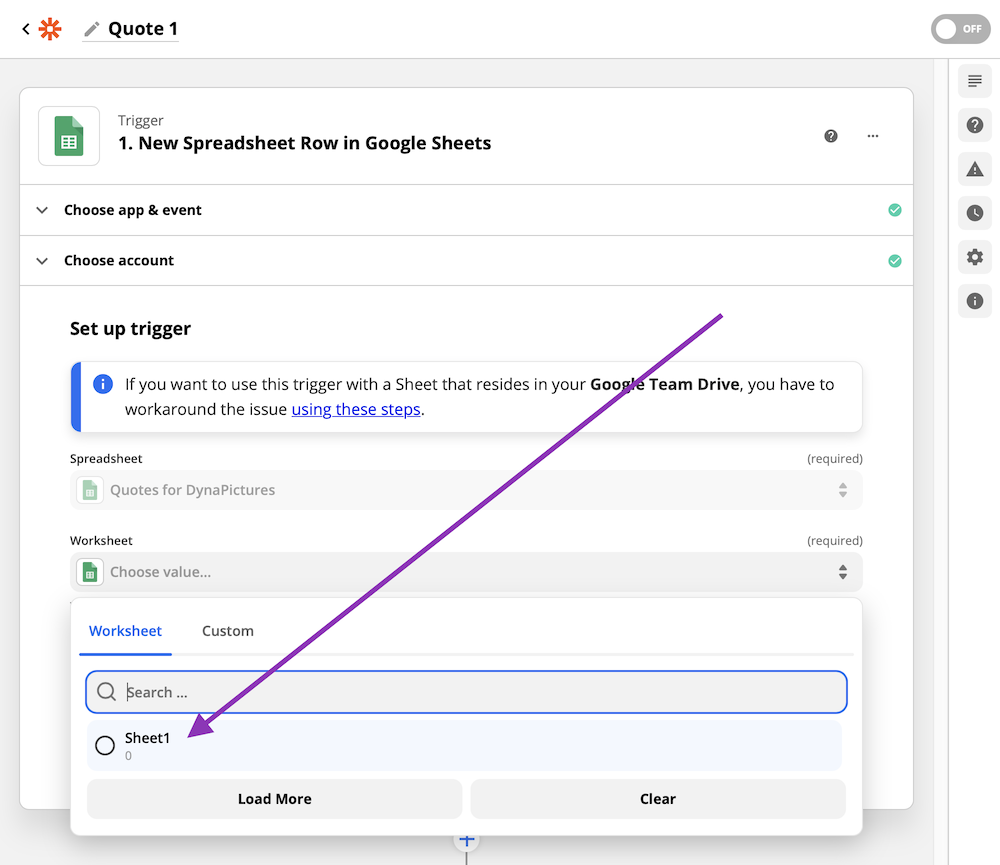
Then select the first worksheet in this spreadsheet and click on button "Continue":
Finally, we can test our trigger by clicking on the button "Test trigger".
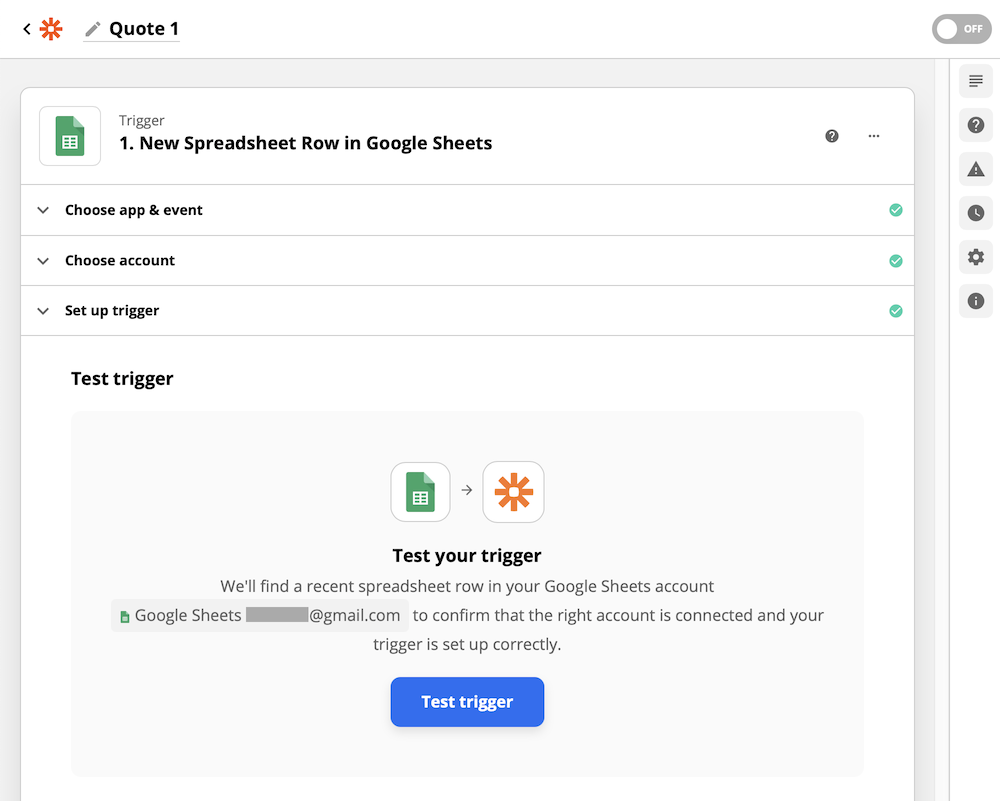
You will see the confirmation message for the successful test. Congratulations! You have just configured your first trigger and can click on the button "Continue" and proceed to the next step now:
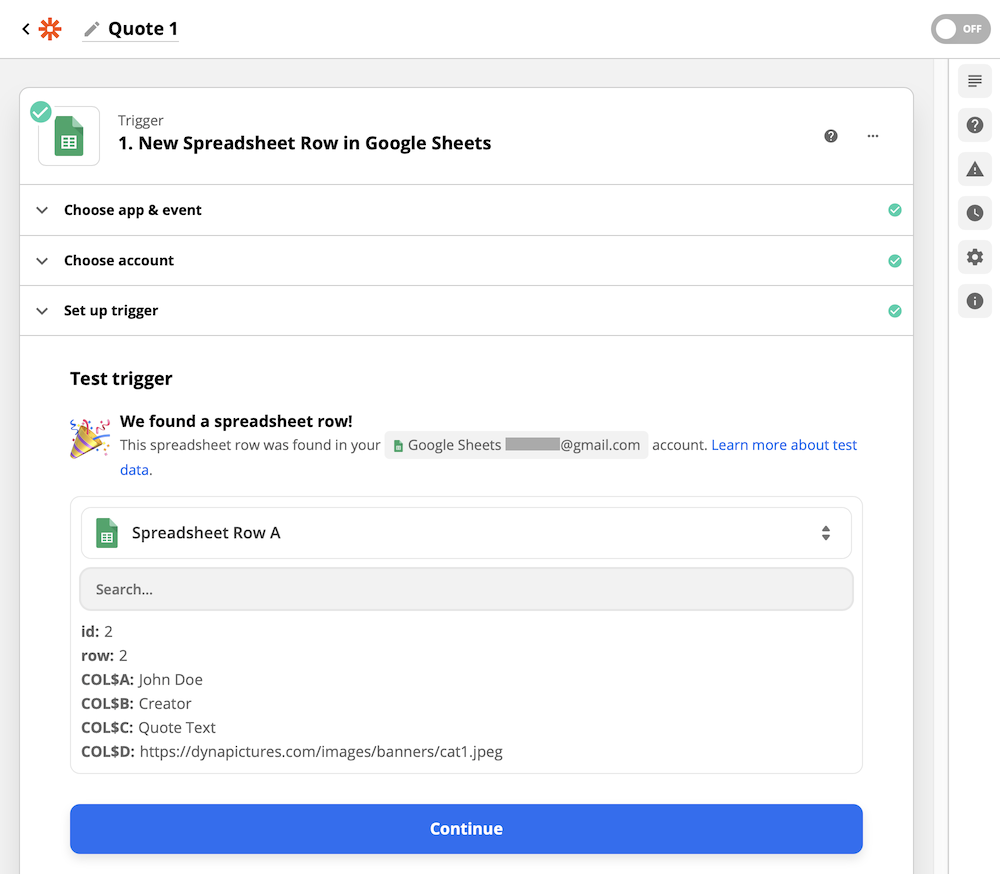
8. Prepare Action to Generate an Image
Once data is loaded from the spreadsheet in the first step, we will push this data to DynaPictures in this second step of our automated workflow.
Start by typing "DynaPictures" in the App Event field and then select the DynaPictures app:
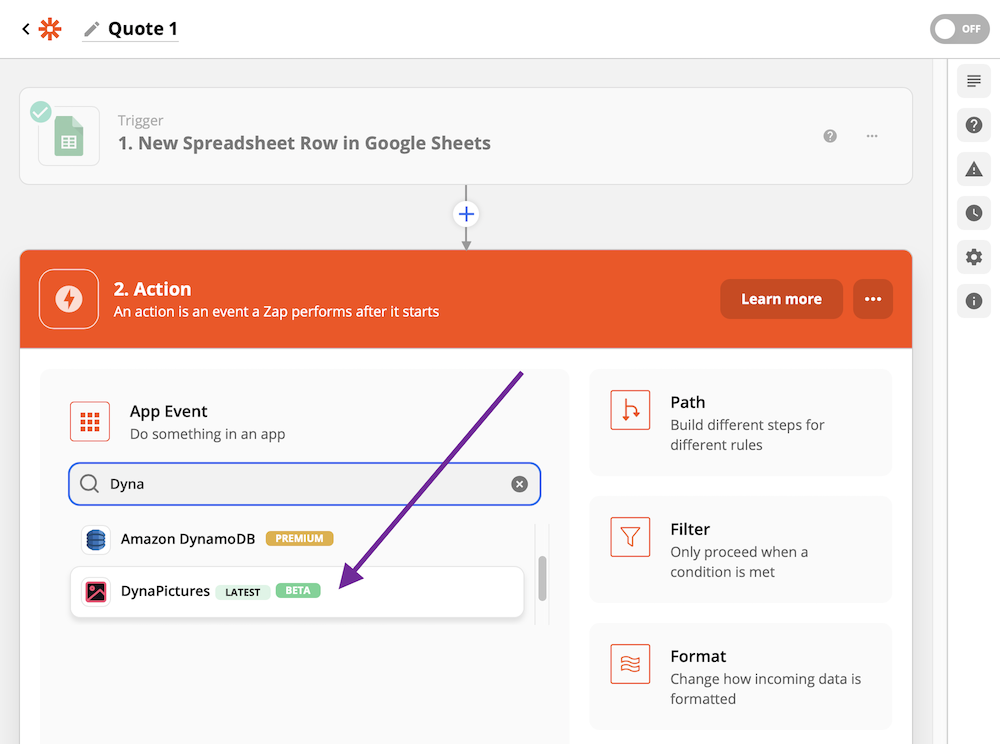
Then select "Create Image" action as an Action Event and click Continue:
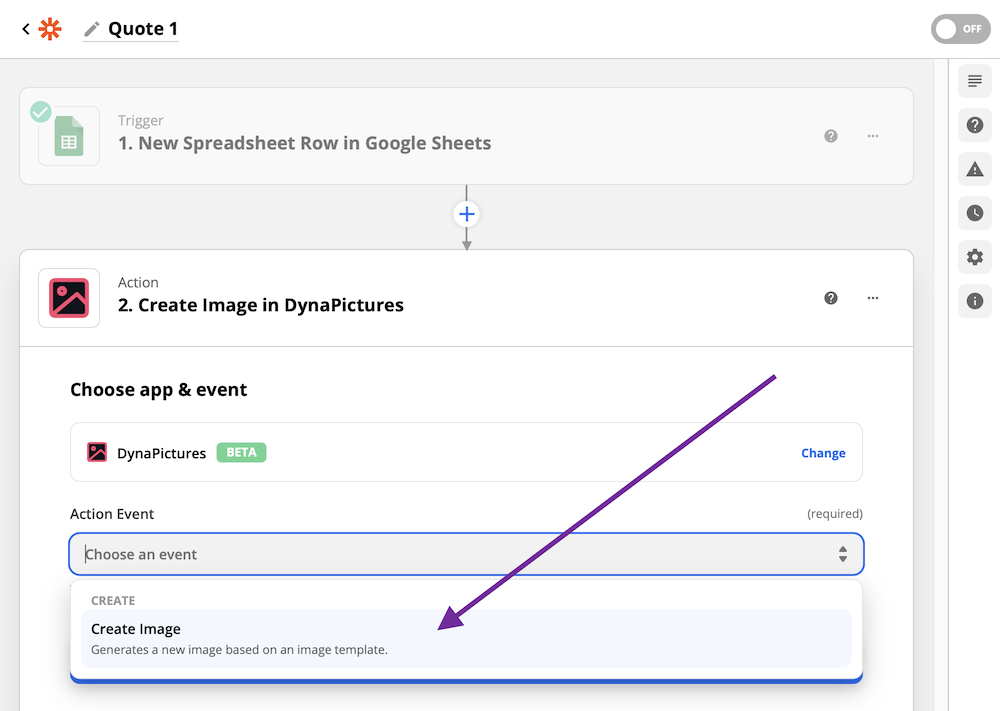
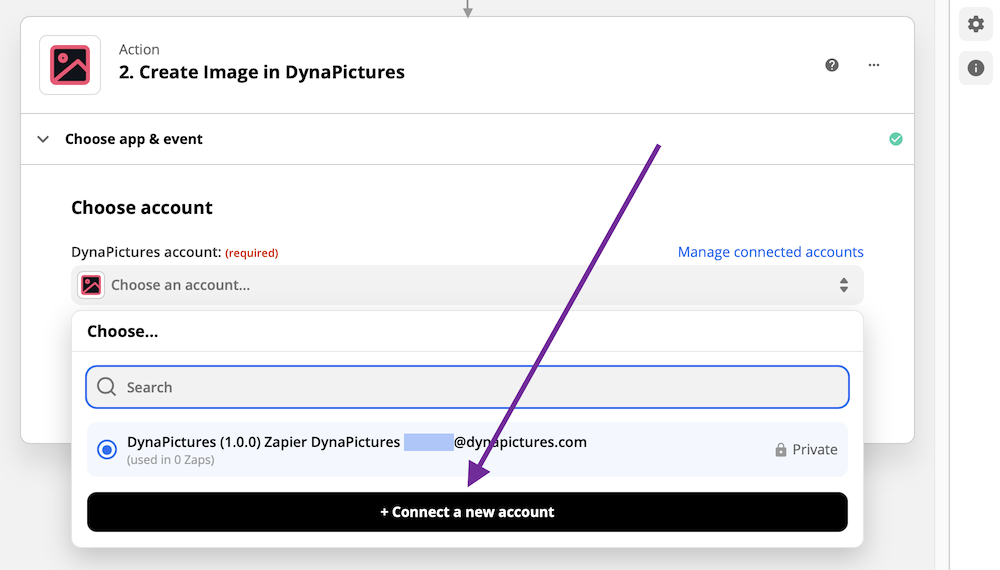
Now you need to add DynaPictures API key to Zapier, so that it can connect to DynaPictures with this key and make requests on your behalf. Start by clicking on the "Choose an account" and then on the button "+ Connect a new account":
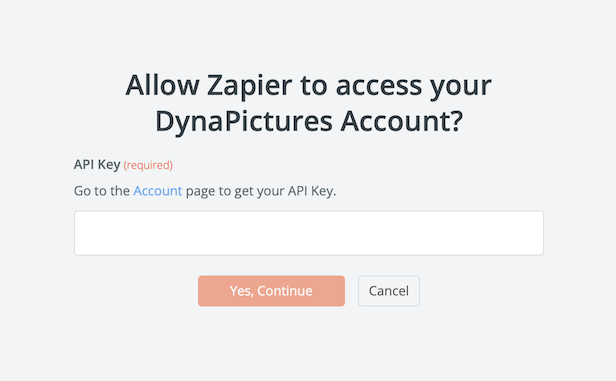
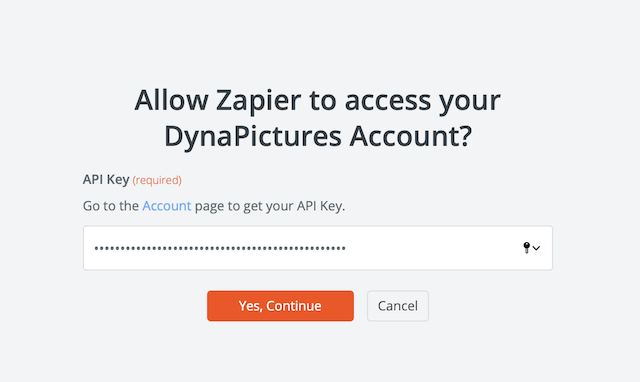
You will see a popup window with the API key field:
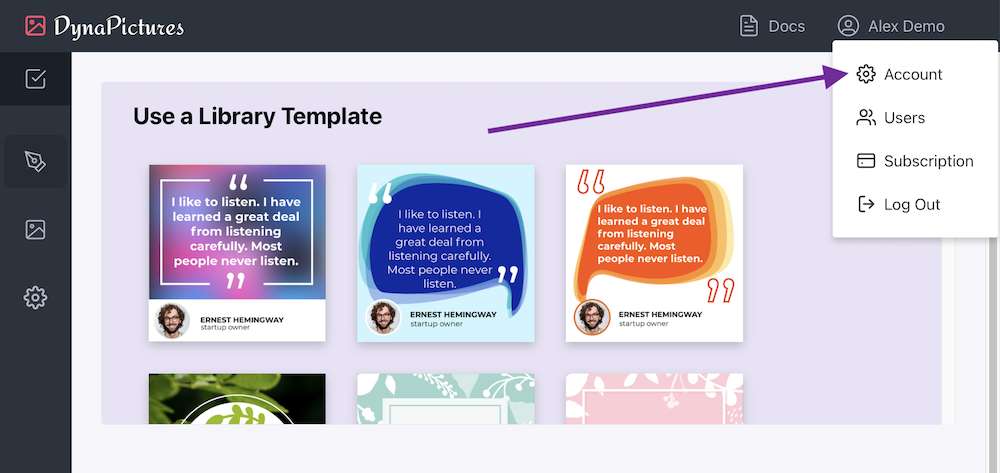
Now let's go back to the account page in DynaPictures, by clicking on your name in the upper right corner and then clicking on the Account:
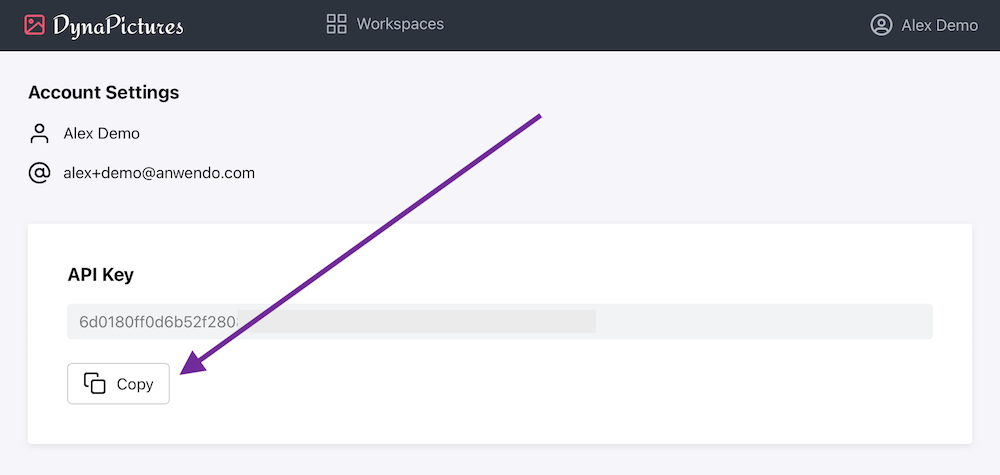
Then you can copy your API key:
Now go back to the Zapier popup, paste the key there and click on the "Yes, Continue":
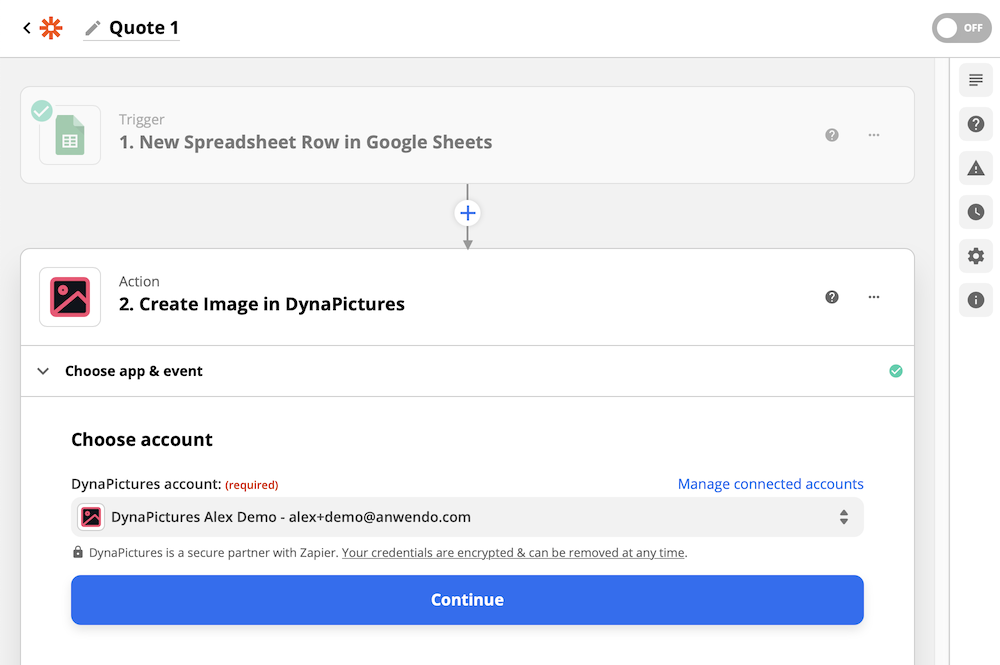
You will be taken back to the original Zapier window, where we configure our workflow. If the popup just closes and you don't see it, you will need to find this window or tab in your browser, see that your account is connected and your email is shown in the account field, and then click on Continue:
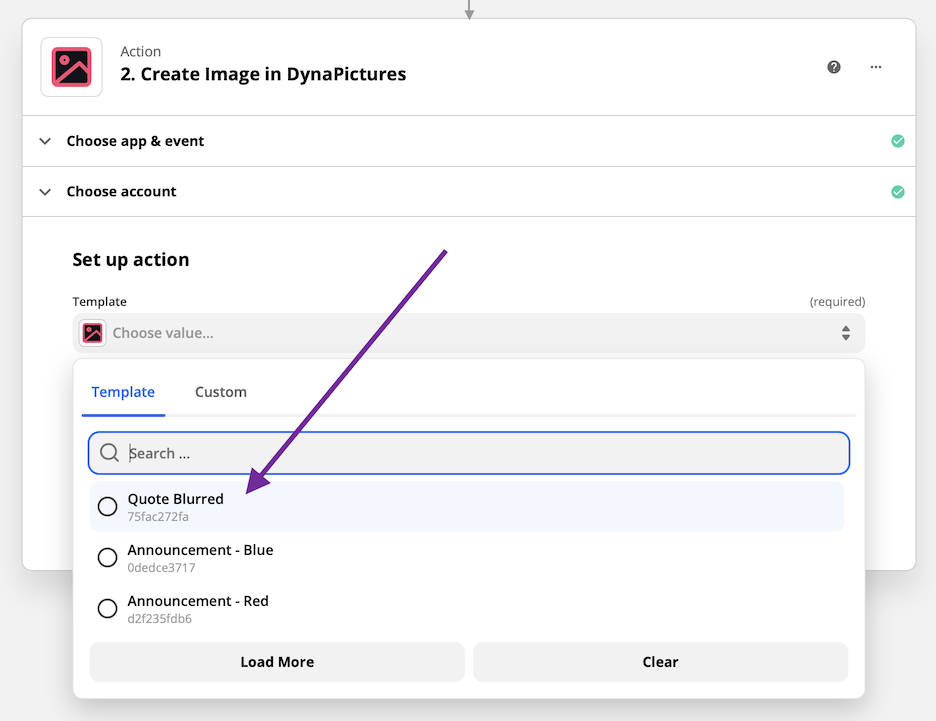
Great, as Zapier can connect now to DynaPictures, it's time to specify which design template we want to apply our personalization to. Click on "Choose value" in the Template field, and then select the image template. In our case it's "Quote Blurred":
Once you select the template, Zapier will show the image layers and possible fields to customize. Now starts one of the most interesting parts of our tutorial - using the power of No-Code as we can glue two systems together by mapping columns from the spreadsheet to the image parameters without writing a single line of code.
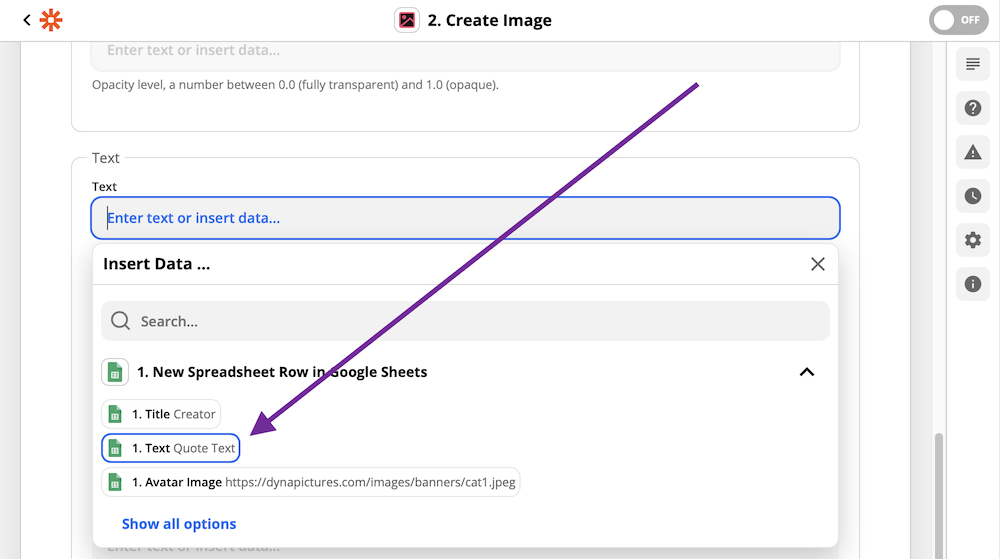
Skip the first layers and scroll down to the "Text" block and then click on this "Text" field there. You will see a list of columns from a spreadsheet with the sample values. Select the "Text" column there:
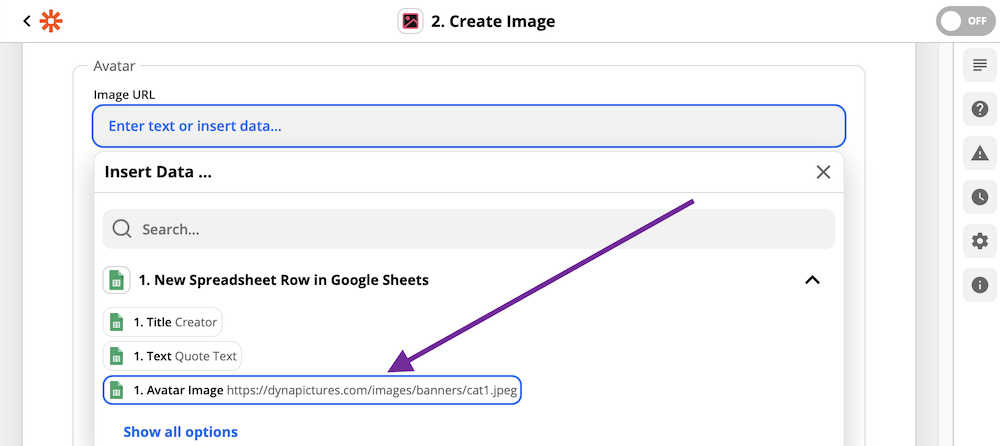
Now scroll to the Avatar section, click on the Image URL form field and select the Avatar Image column:
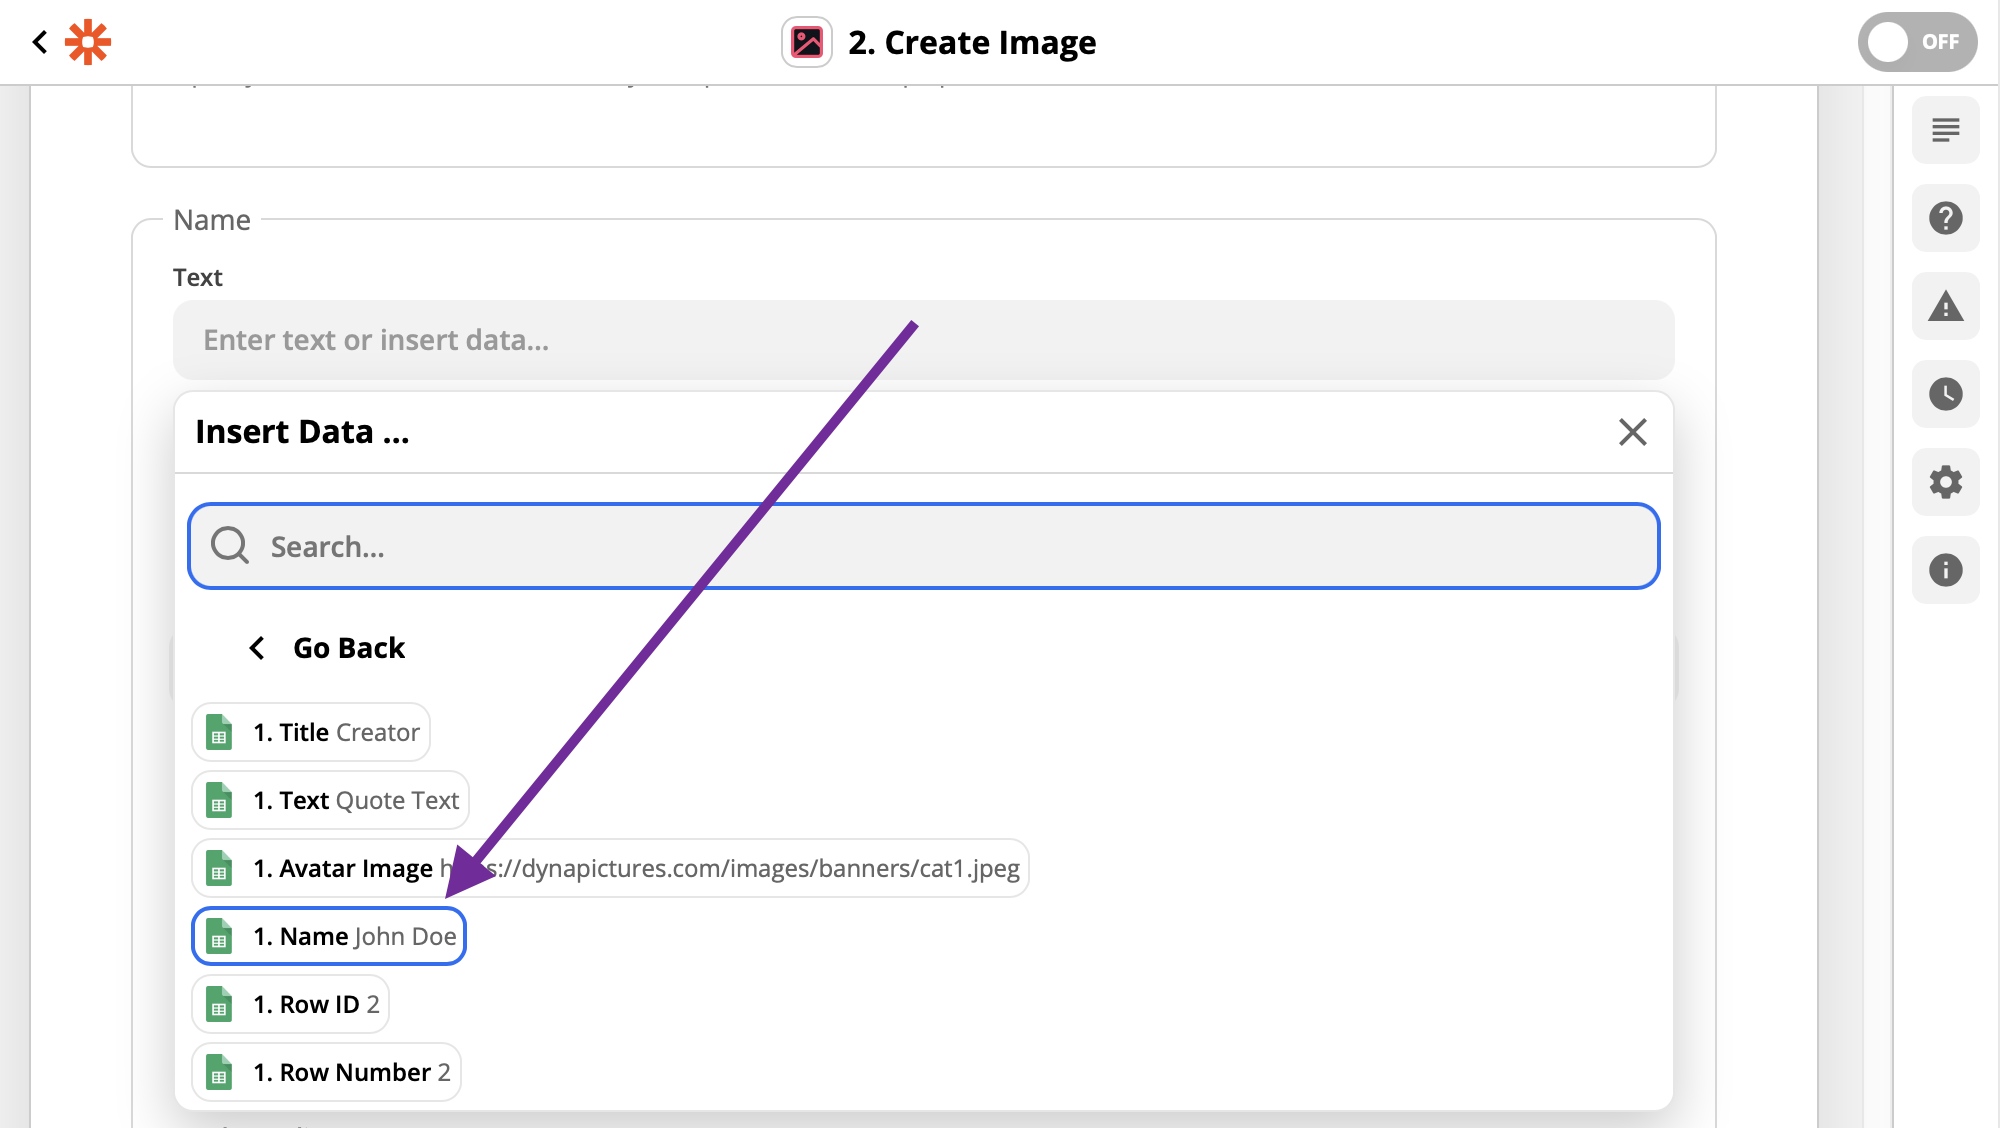
Now let us scroll to the Name section, and select Name spreadsheet column for the Text field:
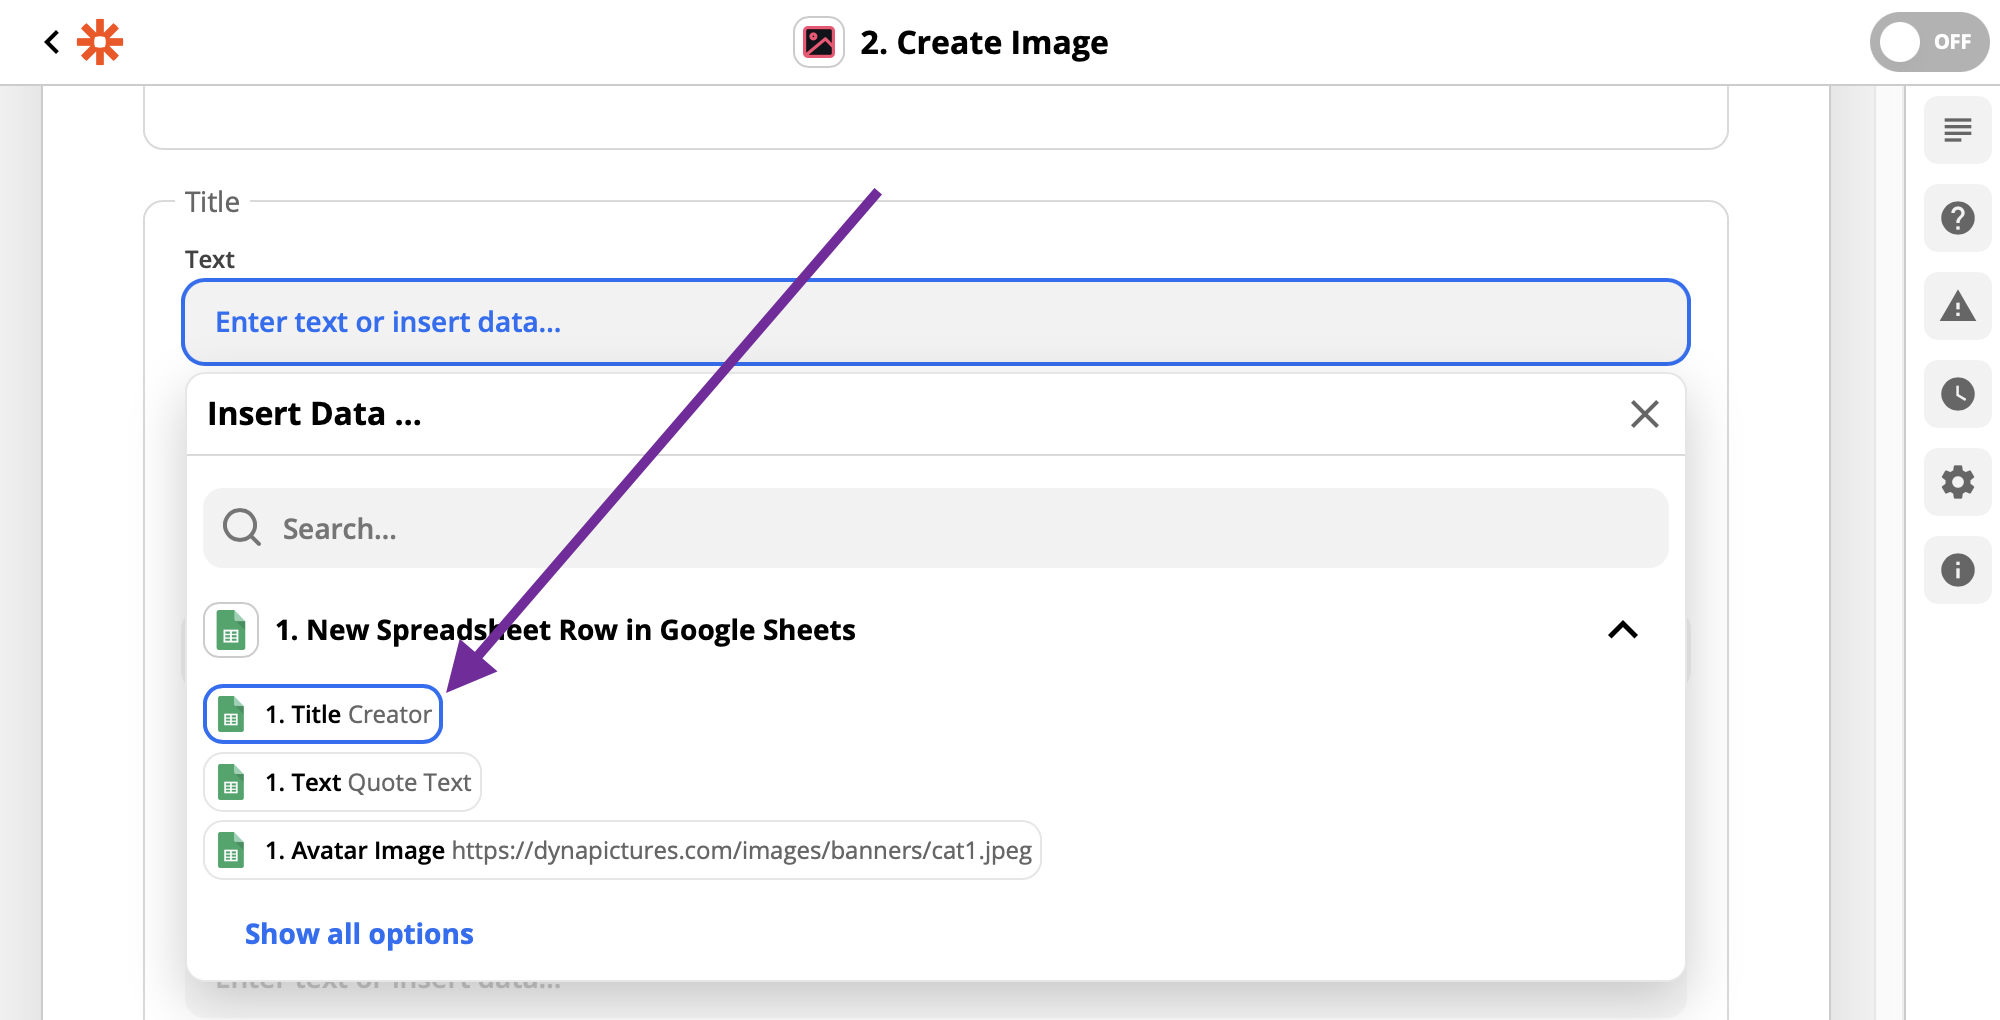
Then scroll to the Title section and map Title field from the spreadsheet to the Text field in this section:
We are done with mapping now and you can scroll down and click on the Continue button at the bottom.
The final part of this step is to test and verify that your action works. Click on the "Test & Continue":
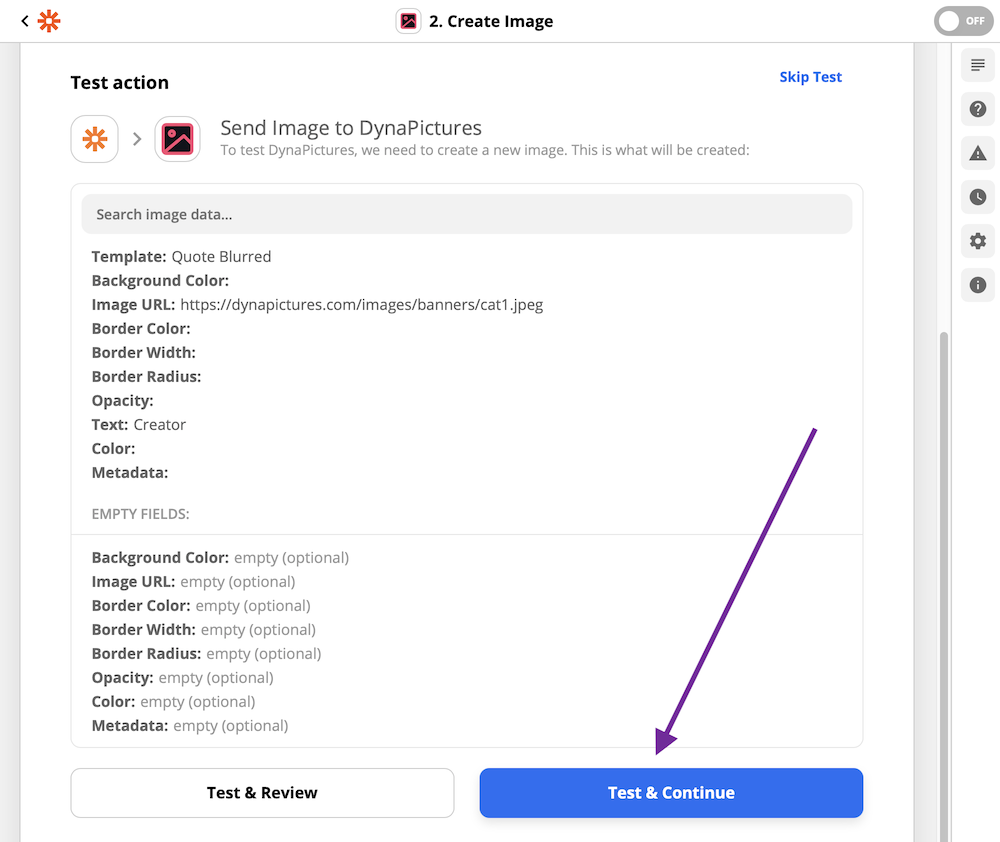
You will see the success notification with the URLs of the generated test image. In our case it's https://api.dynapictures.com/images/8eb9e4869b/13add6dc53.png:
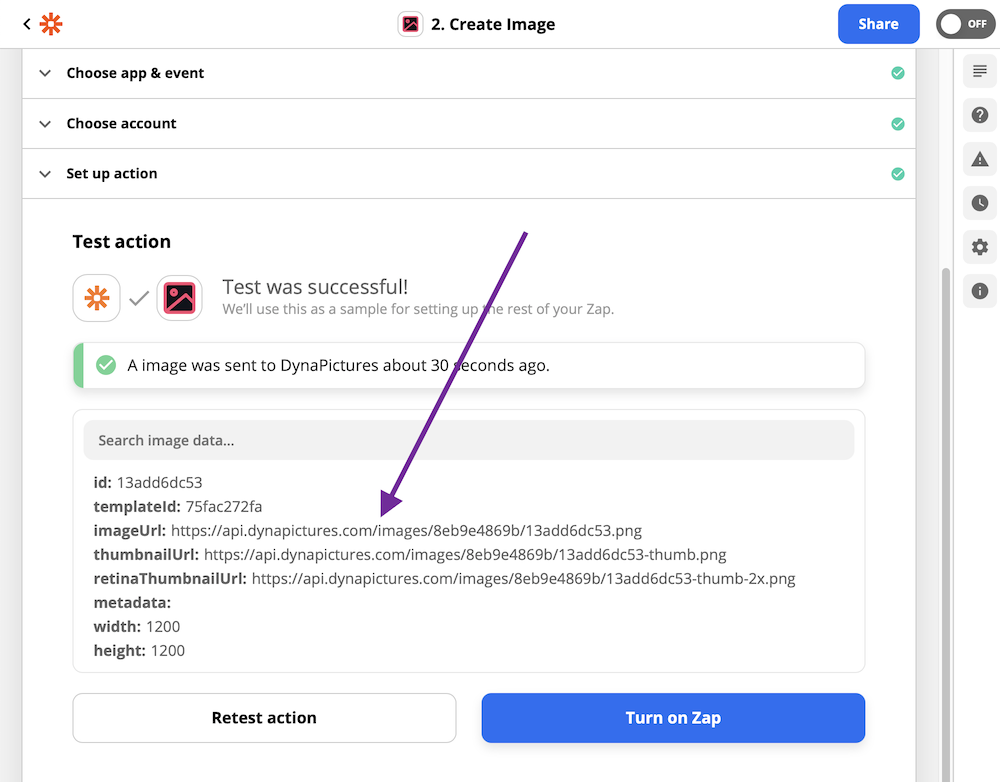
Well done, we are finished with this action now and can proceed to the final step in our tutorial.
9. Save an Image to Google Drive
The final action in our workflow is to upload newly generated image to the folder in Google Drive.
As we will be adding a 3rd action to our workflow, this requires you to be at least on "Starter" plan at Zapier. If you don't have it yet, you will be asked to upgrade on the final step. If you are happy with the free plan and don't want to upgrade, just click on the "Turn on Zap" button of the second step of the workflow ("Create Image"). Then you can add new rows to a spreadsheet, and then see generated results either in "Generated Images" section in DynaPictures, or in the Zap history in Zapier.
Let's start by clicking on the plus icon at the very bottom:
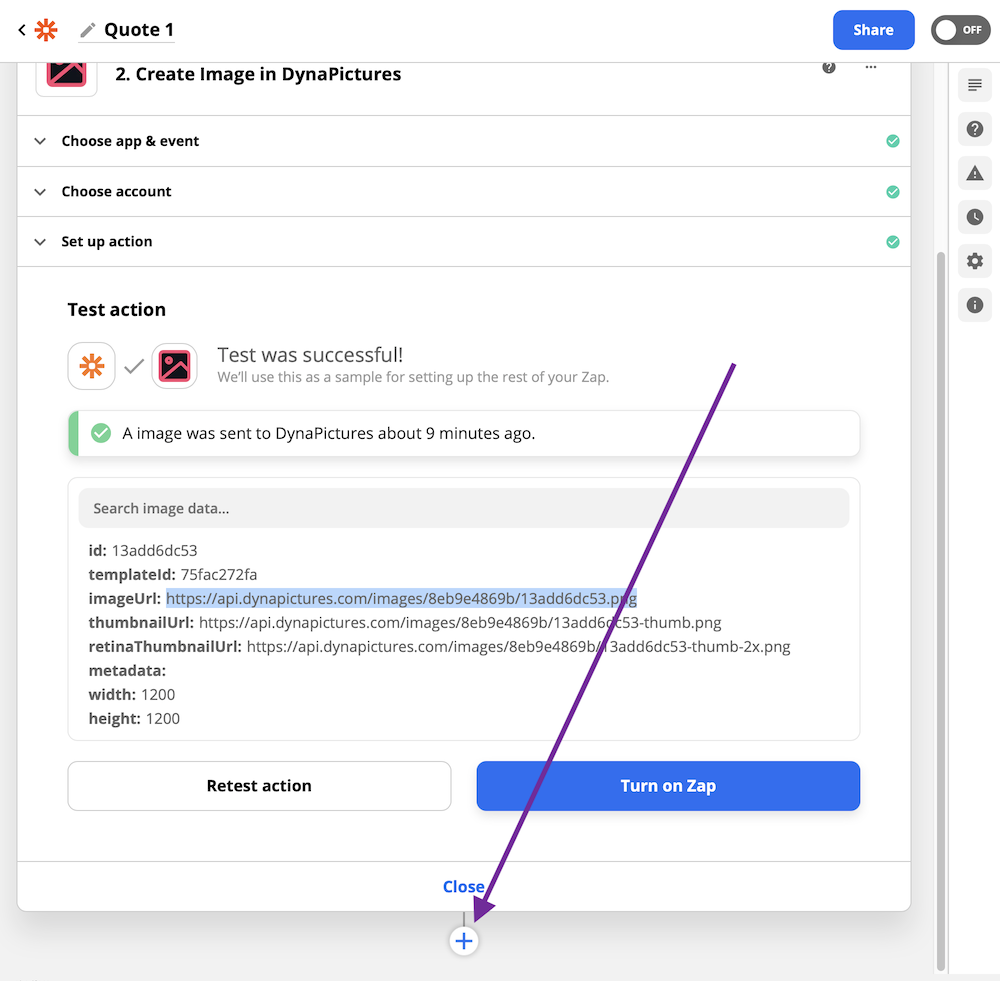
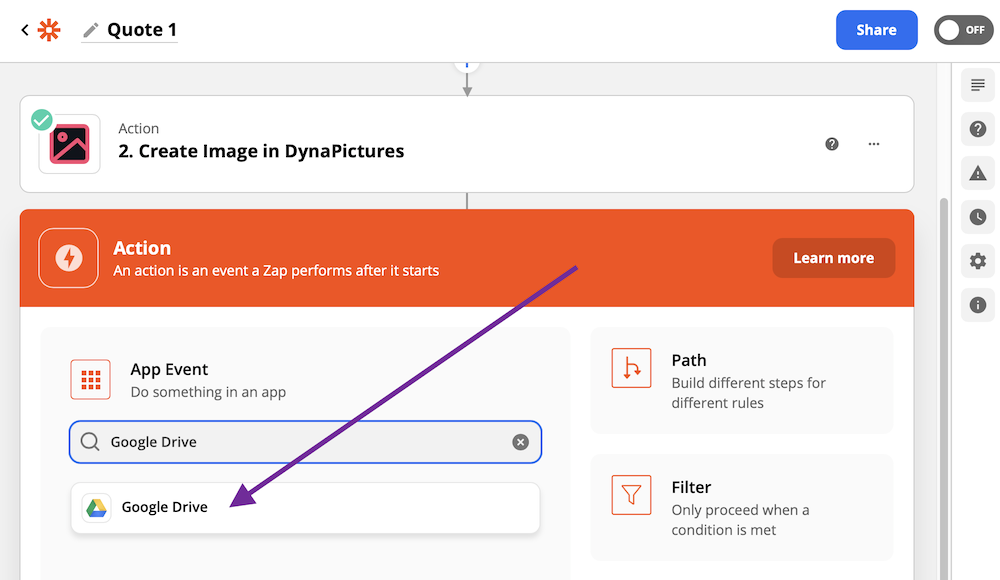
The new workflow step with the action will be added and you need to type "Google Drive" into the App Event field, and then select the Google Drive app:
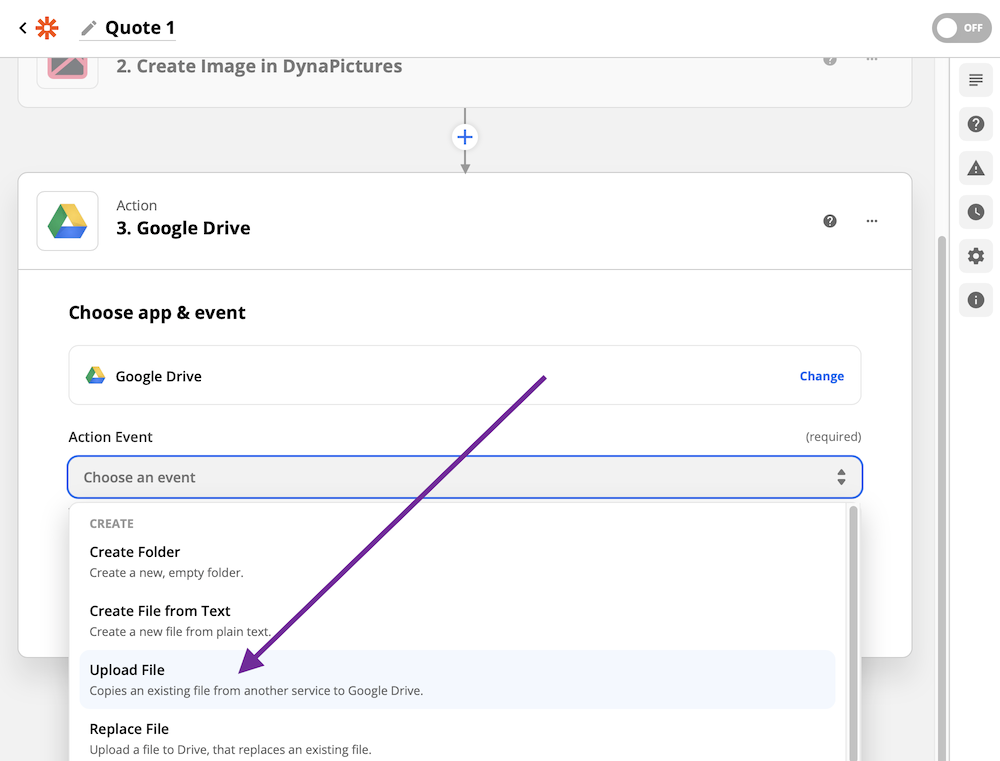
Next, select the action that we want to be peformed with Google Drive, let's click on the "Upload File" action now:
The next step is to connect Zapier to your Google Drive account, so that Zapier is allowed to upload files to your Goolge Drive. Click on the button "Sign in to Google Drive" and then sign-in to Goolge Drive and grant access permissions to Zapier:
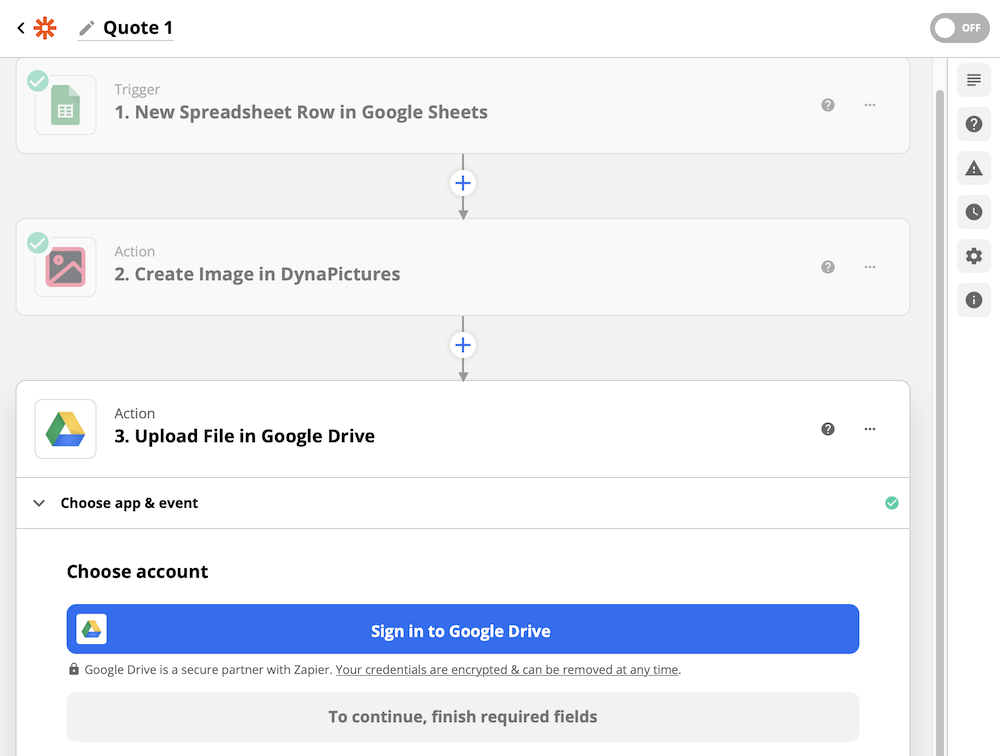
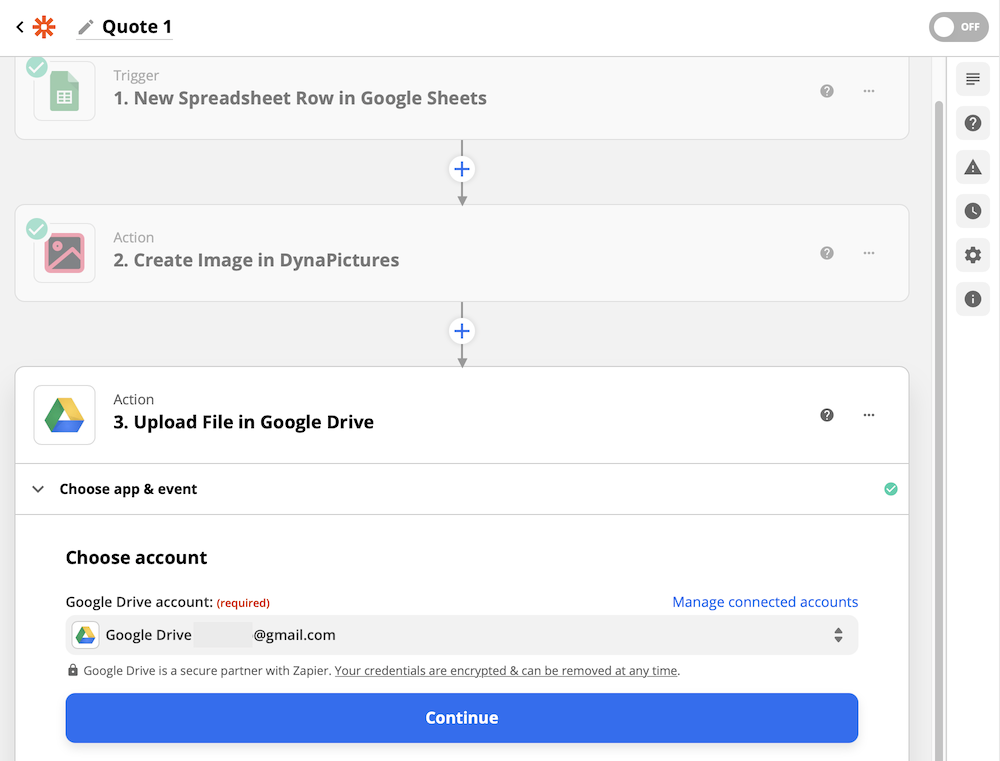
Once your Google Drive account is successfully connected, the popup window will be closed and you will see your email in the Google Drive account field of the form. You can click on the Continue button now.
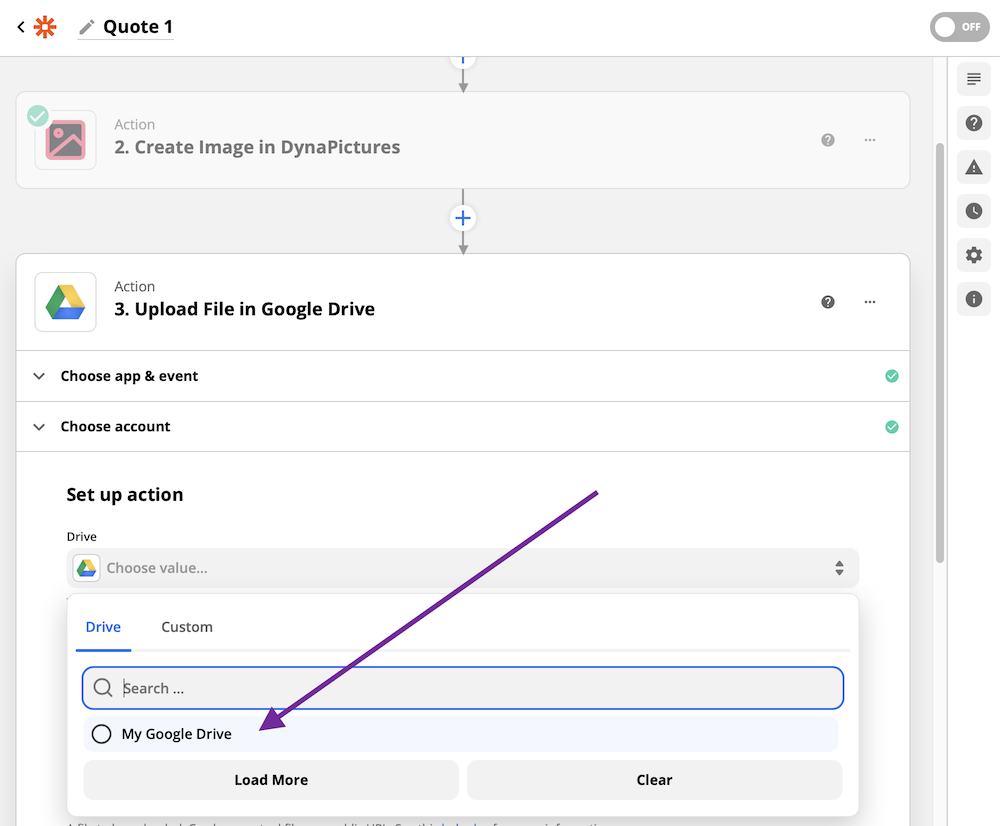
Now let's select "My Google Drive" from the dropdown of the Drive field:
Then click on the File field of the form, then click on the "Create Image in DynaPictures" step and then click on the "Show all options":
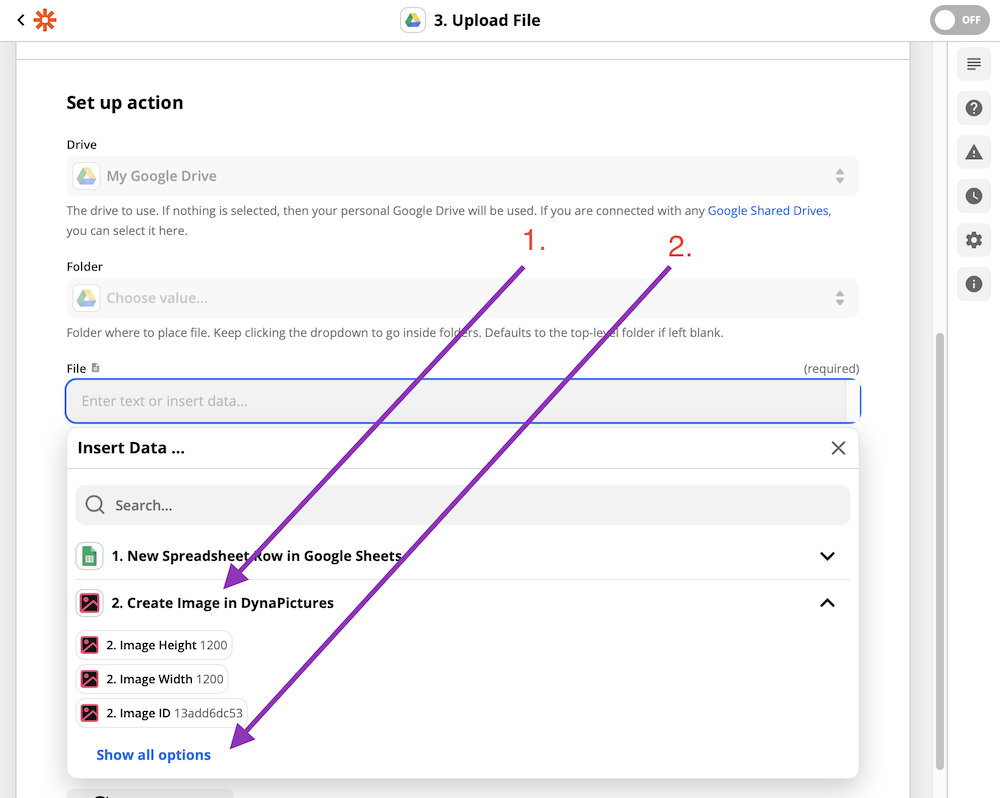
You will see all options now and then can select the Image URL field from data provided by DynaPictures:
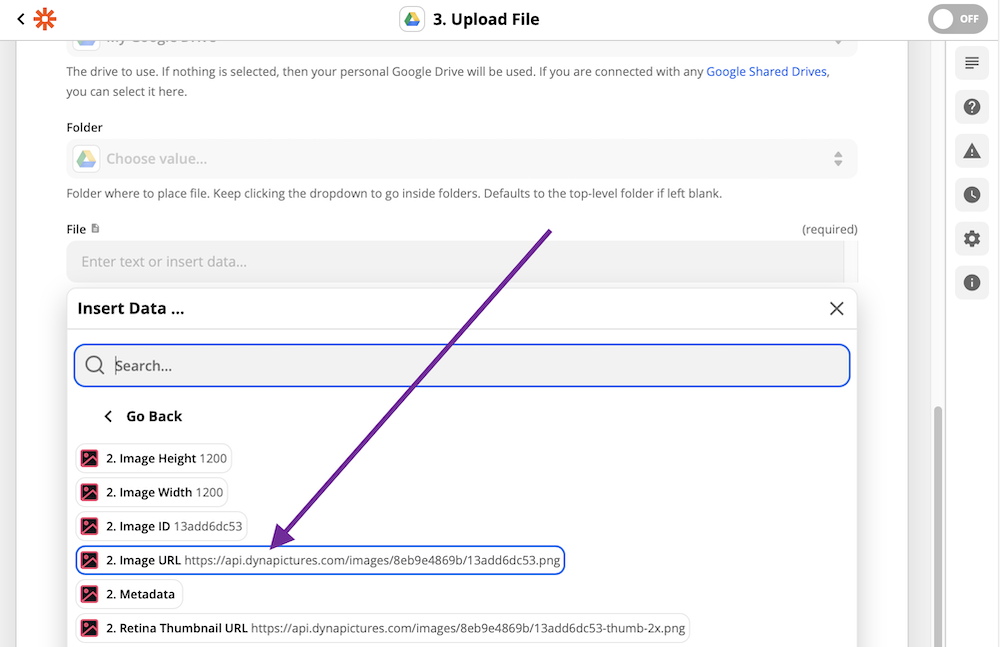
If needed, you can also select the destination folder, assign a custom file name, etc. For a custom file name, you will need another column in the spreadsheet, and then either map this column from the spreadsheet here into the filename field directly, or pass it through DynaPictures via the Metadata parameter.
The final part, as usual, is to verify that the action works as expected. Let's click on the "Test & Continue". You can go to your Google Drive folder after that and see the newly created image there:
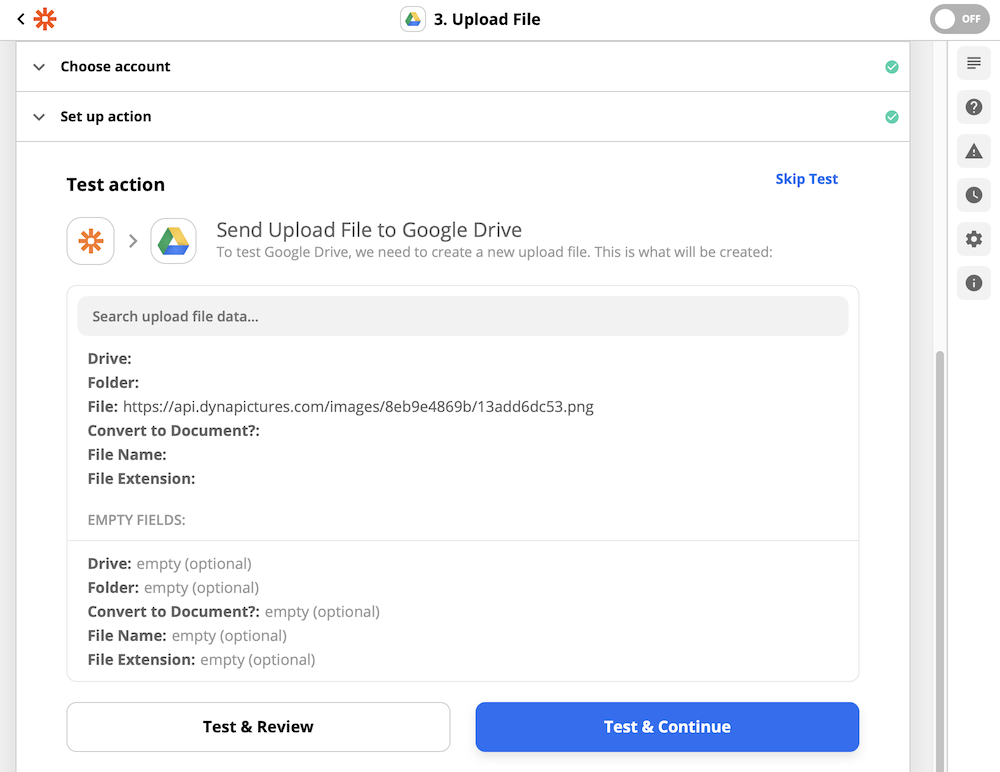
Finally, click on the "Turn on Zap" button:
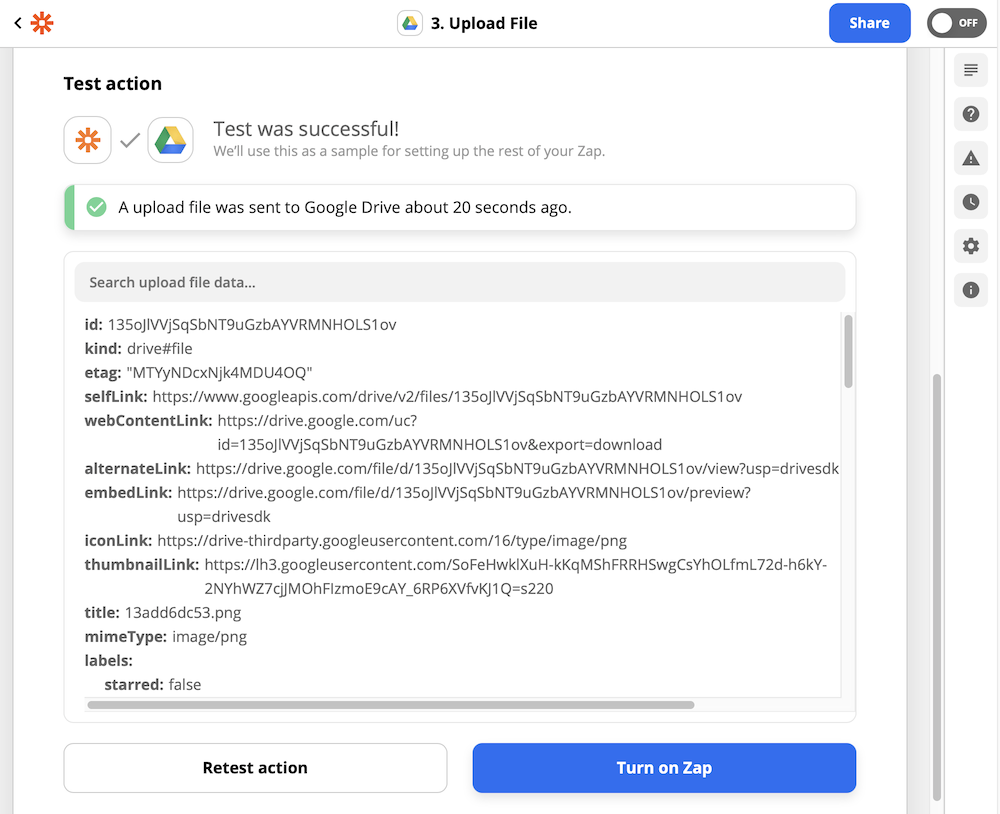
That's it! We have build our first workflow for design automation with DynaPictures! Now you can start adding new rows to your Spreadsheet and DynaPictures will generate personalized images automatically for you.

10. Final Words
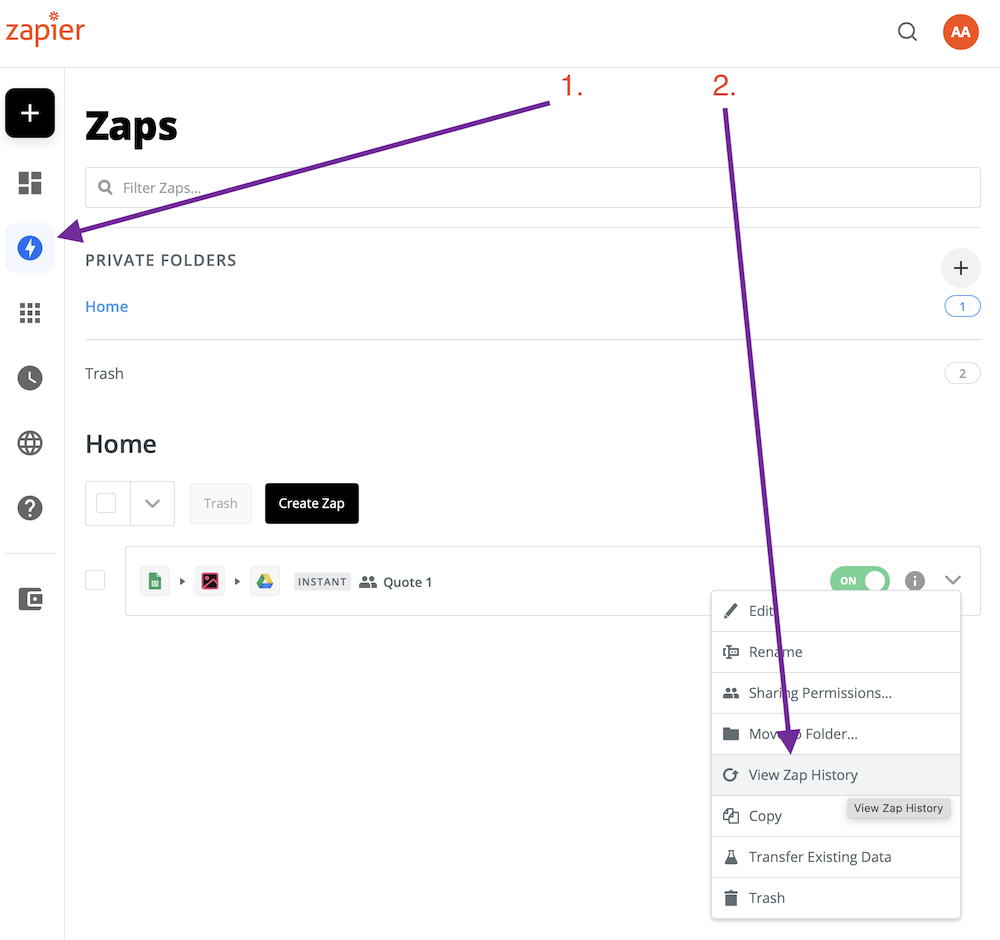
In case of troubleshooting or checking how your Zap works, you can go to Zaps on the left and then select "View Zap History" from the context menu:
11. Next Steps
We prepared some popular pre-made Zaps listed below, in case you need to integrate DynaPictures with other apps as well:

