Table of Contents
1. Overview
2. Create Template
3. Open Form
4. Fill Out Form
5. Generate Banner
6. Share with Team Members
7. Next Steps
1. Overview
On this page, you will learn how to generate hyper-personalized images from an image template using web forms. No technical skills required in this tutorial. Have a look at how we built a twitter demo if you are interested in the REST API integration.
Here is a short video with the steps that we are going to walk through in this tutorial:
2. Create Template
Let's start by creating a new image template. Select "Image Templates" on the left and then create a new image template from scratch by clicking on "+ New Image Template" button. You can also use an existing library template by selecting a template from the "Use a Library Template" area.
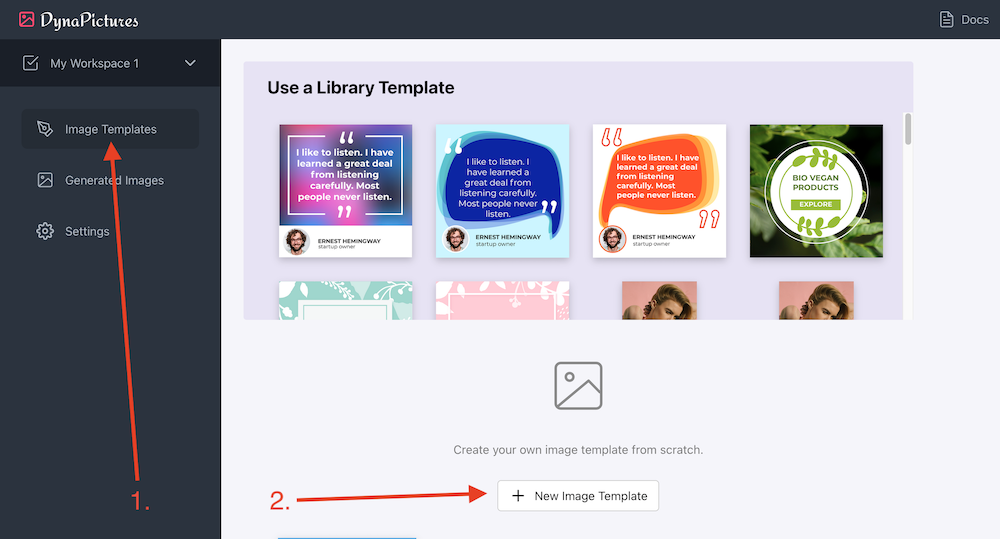
New image template will be created and the template editor page will be opened. Now you can edit template name, change size and add new layers. All changes are automatically saved when you make them. See the annotations on the image below:
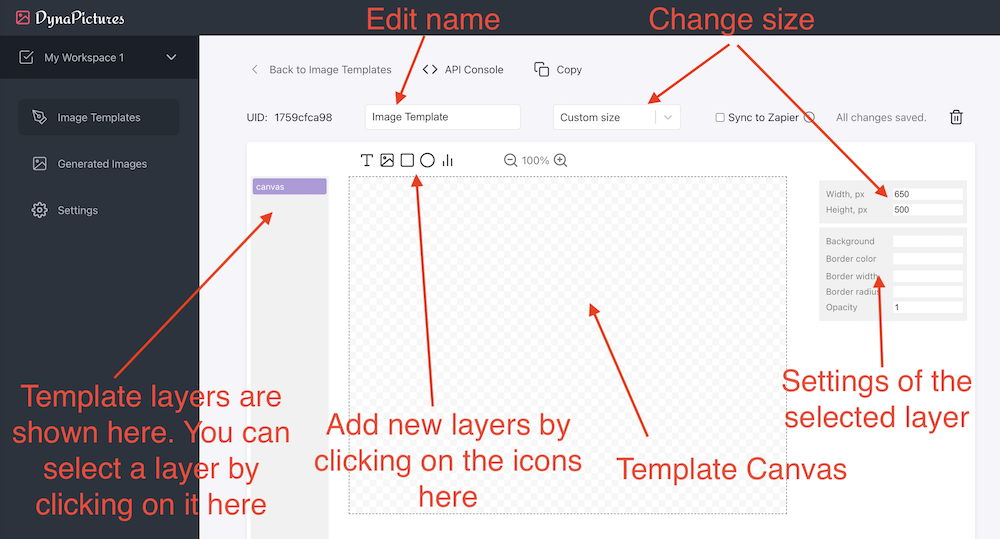
Once you are done with the template preparation, you can proceed to the next step. If you just want to play with the tool and explore its functions, you can just use a library template and carry on with that newly created template.
3. Open Form
We will use an "Announcement - Red" template from a library and once we click on it and the new image template is created, we can open a form by clicking on the "Form" link in the action bar at the top:
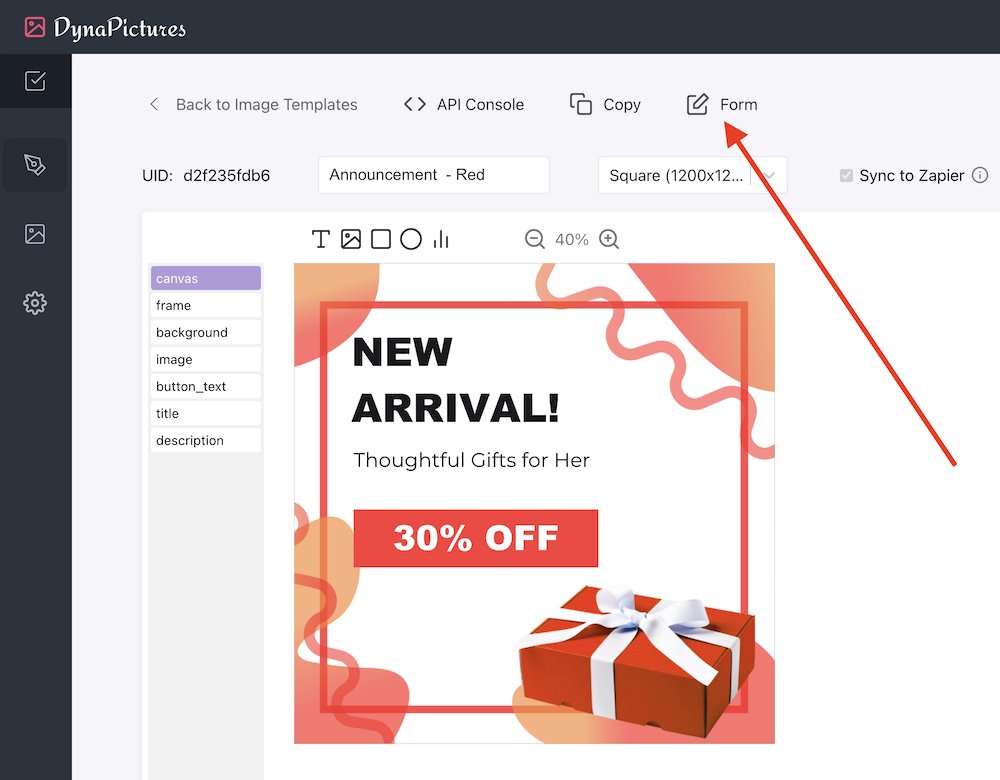
The form page will be loaded and we can proceed to the next step and start filling it out with personalized values.
4. Fill Out Form
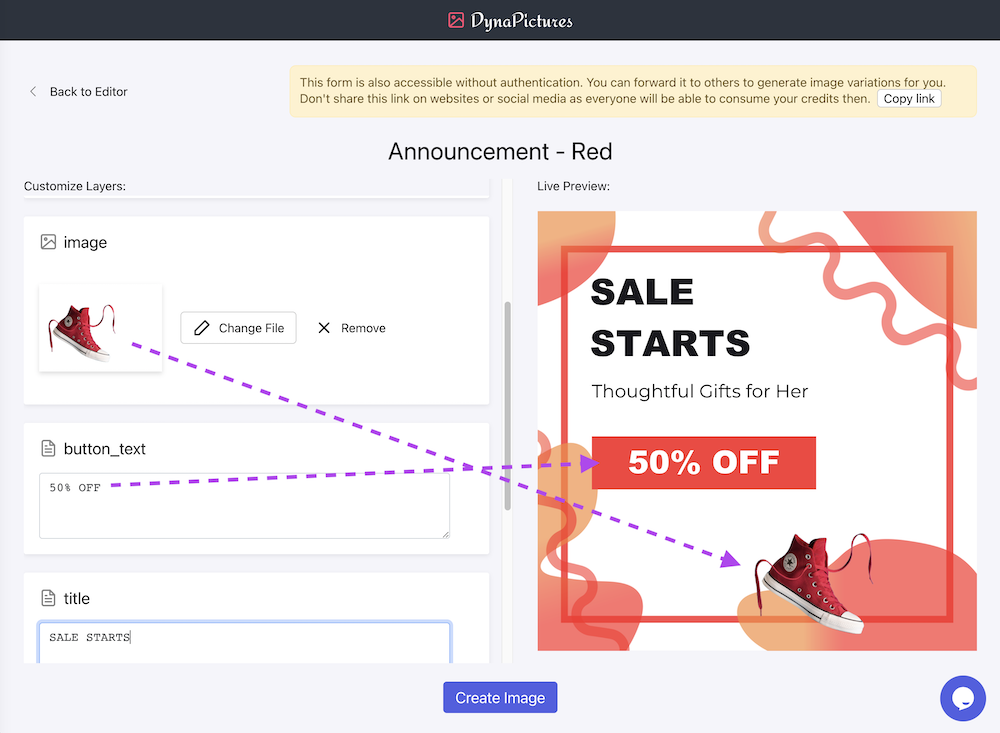
The form page contains the template layers on the left and the live image preview on the right side. The live preview helps to verify results immediatelly and also avoid consuming your image credits.
Let's upload a product image and specify custom values for the title and button_text layers.
5. Generate New Banner
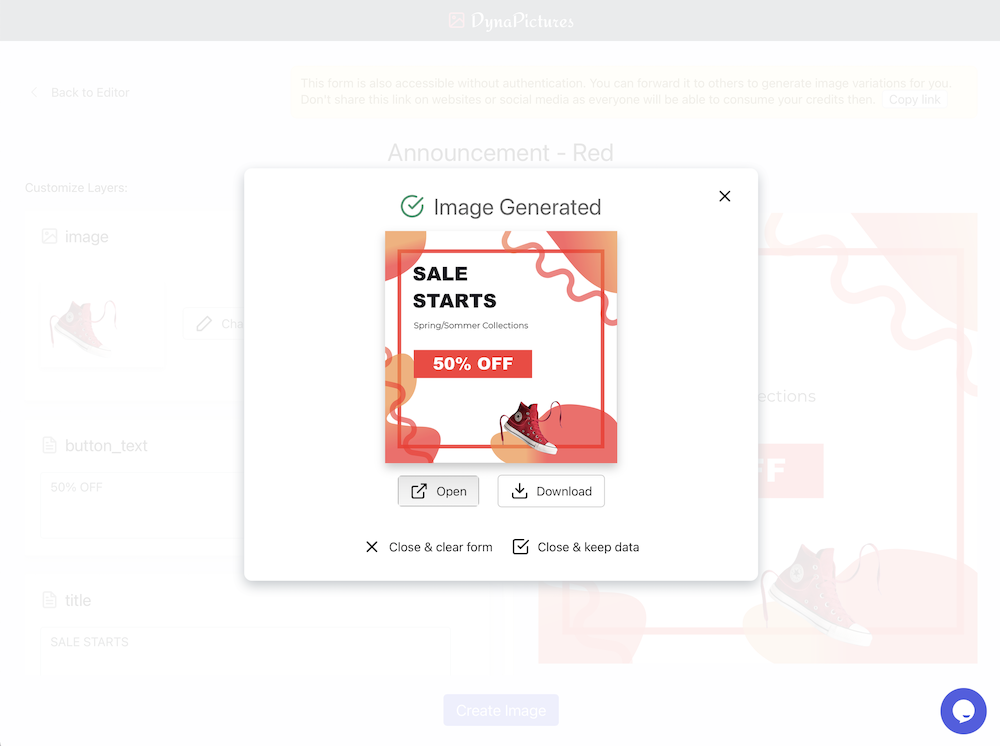
Click on the "Create Image" button at the bottom of the form and then either download an image or open it in a new tab once the auto-generation is done:
6. Share with Team Members
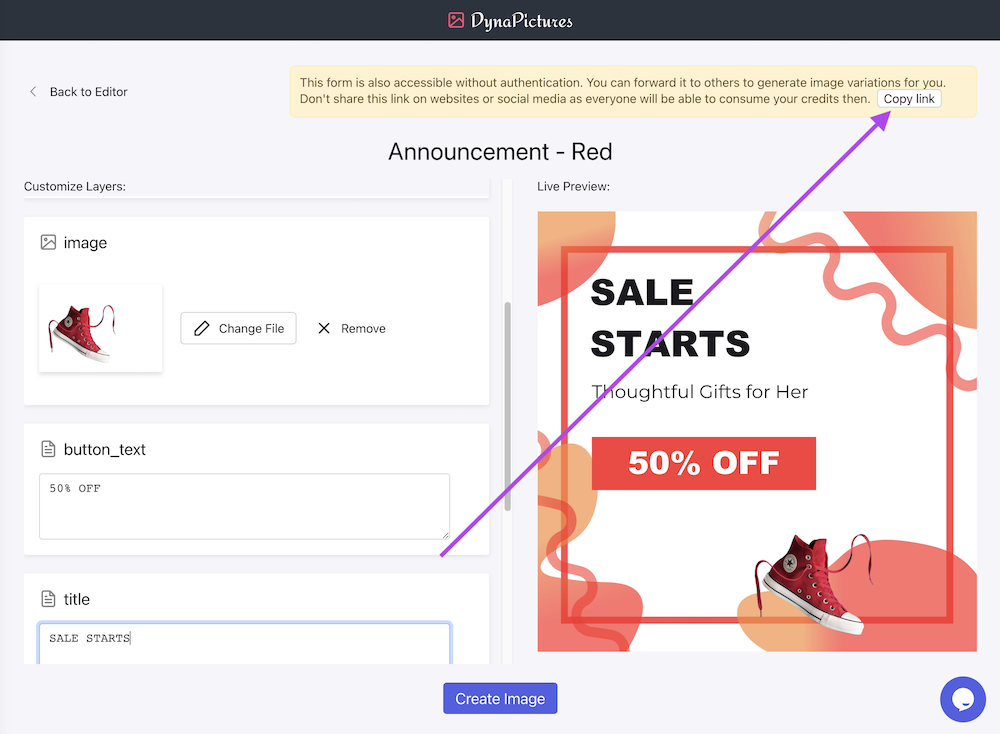
The form page doesn't require the user to be authenticated, in order to generate new image variations. So you can share the link to this page with your team members to let them use the design template and generate new images when needed. Be careful when sharing this link, as anyone with this link can consume your image credits.
You can copy the form link directly in your browser, or use a "Copy Link" button in the notification box:
7. Next Steps
Have a look at the tutorial for generating banners using URL params if you need to show hyper-personalized images on the website or in your emails.

